As a teacher, I have always preferred a handmade card from a child as it feels more personal and I like the effort that goes into it. As a parent to a school-aged child, I was determined that we'd be making his teachers cards for Christmas and at the end of the year, and following a recent gem-sharing session in a staff meeting, I decided that we'd create his end of year card using my latest find.
Tagxedo!

Tagxedo is a great website which allows users to input a bank of words and create a tag/word cloud in a specific shape. In the classroom we use tag clouds for topic work and brainstorming all the words that we can think of connected to the topic; they are very attractive and engaging for children (and adults alike!).
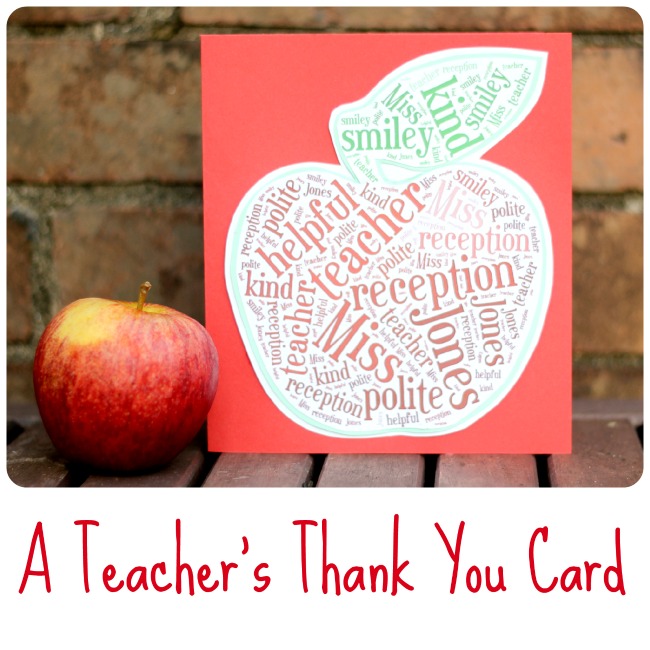
The software has predetermined themes in it which automatically choose a selection of colours to fit the provided shapes. However The Boy and I decided to create a more personalised word cloud in the shape of a rosy red apple for his teacher, made up of all the words he could think of associated with her or to describe her.
Making this card is easy with just a few simple steps, the most important thing to do is install 'Silverlight' on to the computer first, a link is available on the Tagxedo website. The other important thing is to have found and saved a suitable image from an appropriate website, this will be used as opposed to a present shape.
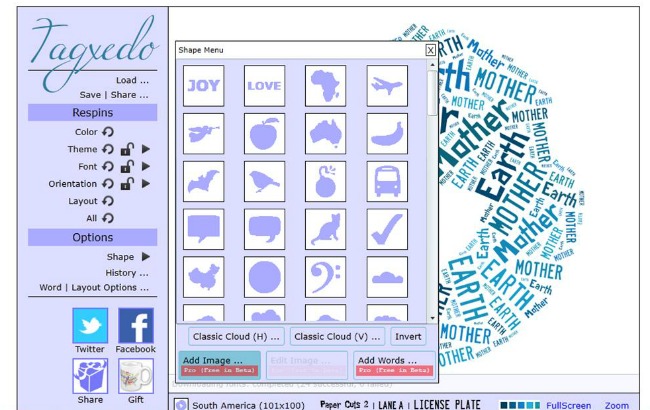
- Click on the black arrow next to 'shape' and click 'add image'. Browse to find and select your image.
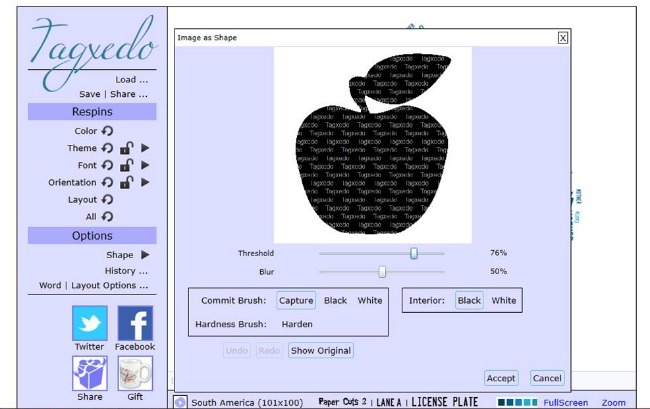
- Once the chosen image is shown, adjust the threshold sliding bar accordingly. Click 'accept'.
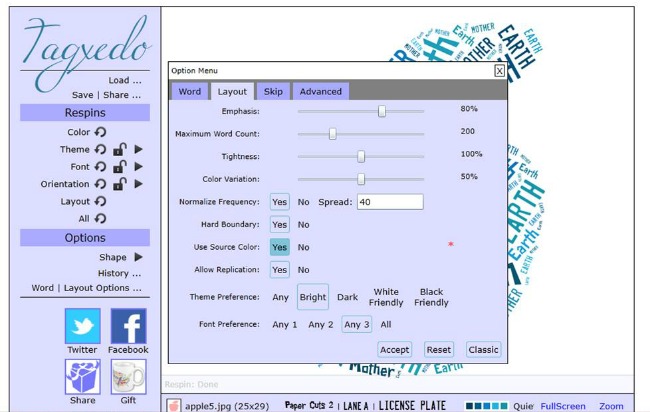
- Click on 'word/layout options' and go into the 'layout' tab. Press the 'yes' alongside 'use source colour'. This will allow a multi-coloured apple to be shown (i.e. a green leaf and red apple.)
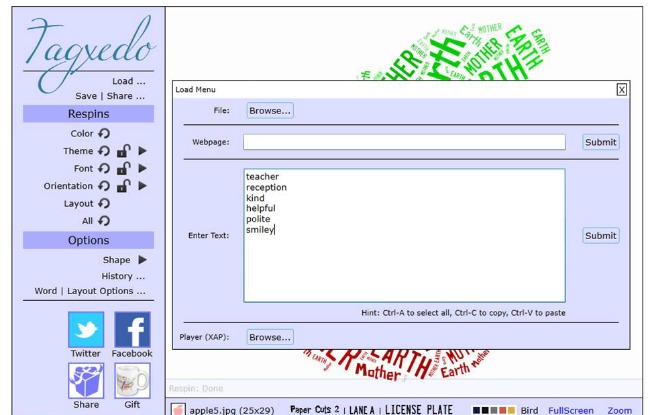
- Next click on 'load' and click within the second box to enter the chosen words; single words work best, and use a new line for each new word.
- The font is chosen automatically, but by pressing the respin button next to the word a random font is chosen. Press the arrow next to the word to choose a specific font.
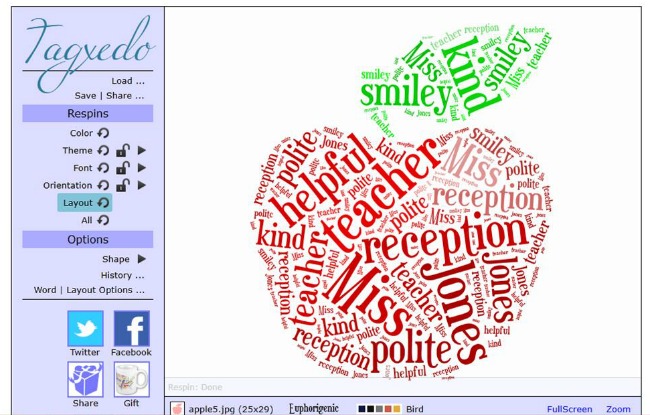
- By clicking on the 'orientation' respin arrow, it's possible to change the direction of the words in a random mixture.
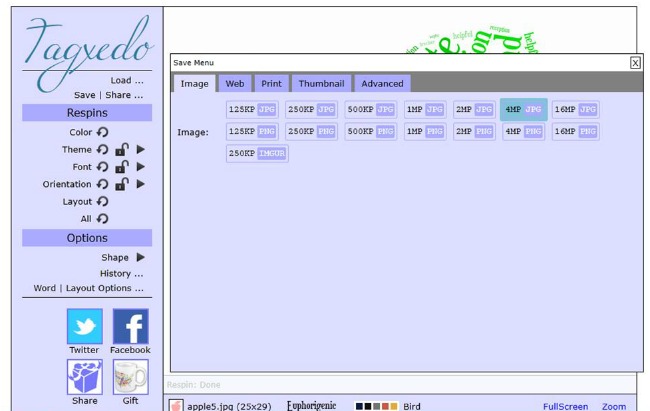
- Click 'save/share' to download the image and choose an appropriate size of image.
- We then cut the apple out and mounted it onto a light green, before cutting it out again and double-mounting it onto white, cutting out a last time and gluing it down onto red card.


This is just AWESOME! You could use it for all sorts of cards and gift tags too. I'm a big fan of homemade stuff and this is definitely being pinned for later x
Exactly my thinking. So easy to do and a really personalised card.
Oooh this is a great idea!! Given me some thoughts for my brothers wedding 🙂
I think it would be perfect for that, especially if you can find the right shape to house the words.
Fab idea! Thank you for this xxx
You are most welcome, thanks for commenting 🙂
Ilove this! I haven't commented onFB as I'm friends with my boy's teacher and don't want her to see it! Will definitely give this a go – thanks for the guidance, no doubt I will need it 😉
Once you know how it's easy, but I did struggle at first and found another tutorial which was wrong on one step. I think it's a really effective card which can be adapted for so many different occasions. Thanks for commenting 🙂
Ooh I love that idea, but what a great website, I might do one for each of the children.
It's a fab facility isn't it? I'm busy trying to work out what else I can do with it!
Love the tutorial!! I have to try this one 🙂 …Pinning it right away… Which doesn't necessarily mean anything more than I really like it! …But I REALLY want to give it a go too 😉
I can't figure out how to make the apple and stem/leave two seperate colors. I can get red and green, but it's all mixed up. Thanks!
The image I downloaded from the Internet had green leaves and red apples. When you go into 'Word/layout options' there is a 'use source colour', make sure that says 'yes' and it will use the original colour of the image you've imported. Hope that works!
Hi, I'm trying to this at the moment, but can't get the different colour leaf/apple. Can you post the link to the picture you used? Thank you.
Yes, I am having a hard time figuring out which image to upload as well. Where did you get the image in order to upload?
Thanks so much!
This is so cute! I'm trying to do it now 🙂 However…I saved a pic of an apple, tried to add image, but it won't show up & I don't see where to adjust the threshold either. Help! What am I doing wrong?
Me too Candice. Im wondering if the website has altered things to not allow certain things 🙁
Very disappointed that It didn't work for me . I installed Silverlight and still nothing.
All or your directions are clear but I cannot locate the "threshold". My apple will not print red and green like the original even after I have clicked yes to source color. Any suggestions?
I can't get the apple to be green and red. can you help me?
Hi Heather,
Click Shape Menu (the Play button)
Click Add Image ( I saved a picture of an RED apple and GREEN leaf from the web)
Then go to Word | Layout Options… on the Layout tab Toggle Yes to Use Source Color
Click Accept. This should use the color of the image you uploaded.
Let me know how it goes…
Hi All,
I think I figured it out to get the apple red and stem green. Find a picture online of an apple, save it to your computer and then under Options- Shape click the Play button – Click Add Image and locate the picture you just saved. Make sure in Options- Word | Layout options- Layout – Use Source Color is toggled Yes. Hope this helps.
Sorry I didn't reply sooner, I'm glad that you worked out how to get it to work for you. Hope the results are fabulous.
I love this idea and made a great gift but it won't allow me to save it. What is the problem?
WOW!!! Thank you so much for this, I made my daughters teacher an apple, just like yours and then went experimenting with different shapes, fonts and colors (I LOVE that I can use the colors of the picture I added, as I found a rainbow colored butterfly that turned out AMAZING!).
The added feature of having it save at the size and quality I want, and all of this being free…I am just amazed. Thank you again!
I would love to add our teacher name and year but it doesn't let me:(
Do you have any tips?
The 4th point down in the tutorial explains how to personalise the card with words, it starts "Next click on 'load'…"
It's worth noting that it only copes with single words not phrases, so will separate Miss and Smith (for example). I didn't try Miss_Smith because I didn't think about it. It's possible to give that a go and then once you've saved the image you could try and edit out the _ in an online photo-editing website?
Good luck!
Thank you so much for sharing this tutorial. I am putting together an end of year card for our class teachers & assistant. Each child is contributing a word that describes their teacher and I'm adding in everyone's names as well. The graphic is completely amazing and so sweet. It's going to make such a special gift.
It's comments like this that absolutely make my day, thank you! I'm a primary school teacher as well, so I know the value of a personalised gift. I hope that the teacher appreciates your hard work!
Thank you so much for your easy to follow step by step tutorial and the clever idea!! I have just made a stunning class gift for the children to give to their teacher at the end of the year. Thank you so much
Hello having trouble changing the body of the apple words to red and the leaf into green words??? Doesn't happen when I follow your steps.
Hi I really love this program and the steps you provided are very helpful when I first started. I was wondering how to do phrases/quotes instead of single words. I want to have teacher type quotes (i.e. ONE OF A KIND instead of KIND). Any idea how to do that or is that not possible with this program?