Easter Crafts From Yellow Moon (Review)

There are a few times of year that really lend themselves well to craft for children; Christmas is one and Easter is the other. However, while children love creating items from basic materials, it can be quite daunting for some parents to visualise the finished item, or to see a piece of craft and work out what was used to make it. We've been sent some really easy Easter craft kits from Yellow Moon, yet they are incredibly effective; enough to satisfy children's crafty cravings, and calm parents' frazzled nerves.
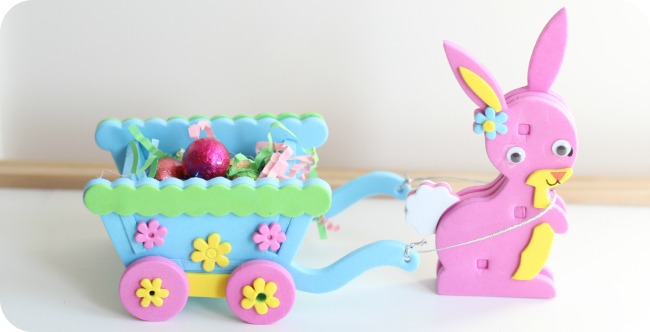
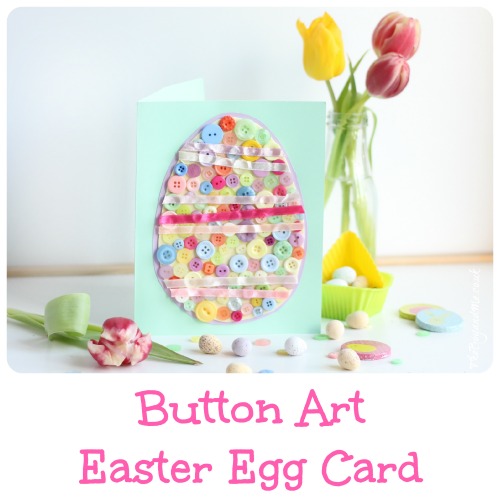
Easter crafts

[Read more…]

50 Things Challenge: #18 – Create Wild Art

Playing outdoors over the Spring and Summer months is easy and enjoyable for all; it's normally dry, warm at least, and the world is full of greenery to fill the heart and soul. I know that during the Summer holidays we've spent more waking time outdoors than we have in, and have almost forgotten what the television is.

I started in February or March of this year vowing to play outside with The Boy for at least fifteen minutes every day, and we've managed it every day since. So much so that it's now part of our routine and we both feel like we're going stir-crazy if we stay in for too long.

However, with school starting and Autumn (and the other season which shall remain unnamed at present) approaching, play tendencies change; the temperature drops slightly, another layer of clothing is needed, wellies not sandals are the footwear of choice, and sometimes time just doesn't allow for a huge amount of outdoor play. Regardless of all of these factors, our need to reconnect with nature doesn't diminish and it's a well-documented fact that time spent in the great outdoors can have massive benefits for all involved; specifically our children.

So MumOnTheBrink and I had an idea in the Natural Childhood Facebook group to set a challenge to help people continue the National Trust's 50 Things To Do Before You're 11&¾ project during the forthcoming, less-inspiring months.

Each month we will identify one of the 50 Things as a project, and open up a blog-hop for the month to encourage other bloggers to get outdoors and complete their lists.

50 Things Challenge - Create Wild Art

September is #18: Create Wild Art

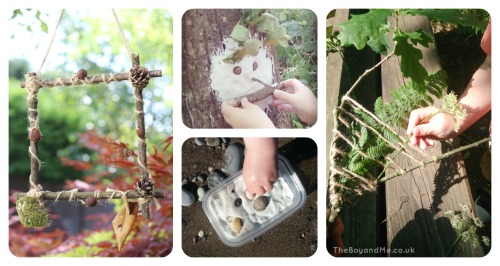
You could decorate picture frame, make a forest face from mud or air-dry clay, create a beachcombing treasure tile, or a whip up a woodland weaving. There are oodles of other ideas out there too, check Pinterest for some great ideas.

Please enter your wild art activities completed during the month of September into the blog-hop below, Monika and I would love it if you'd copy the code into your post as well as it will spread the word about the 50 Things challenge.

Now pop outside and have fun!


Don't forget to link these up to Coombe Mill's Country Kids weekly; Fiona is the main reason that I continued last Winter to play outdoors before we started working with the National Trust.

How To Make A Stick Picture Frame

On a recent trip to one of Britain's finest arboretums, I took our trusty craft bag with us for when I would be presented with the obligatory sticks. The place was full of wonderful vistas and so I suggested to The Boy that he collect me four sticks of equal length and a variety of interesting treasure to decorate our finished product.

How To Make A Picture Frame

You'll need:

  • 4 sticks of equal length, or 2 pairs of sticks of equal length
  • natural string
  • collection of leaves, conkers and pine cones to decorate the frame
  • Swiss army knife

Encourage children to only choose twigs and natural 'treasures' found on the floor, creating a respect for the natural world.

  1. Lay the four sticks for the frame on top of each other to create a square. Carefully wind a length of string around each of the joins, overlapping and winding from one corner to the other. This will hold them in place.
  2. Complete for each corner, winding any extra string along the sides which will help create somewhere to secure the 'treasures'.
  3. Tie a selection of pine cones to the frame and thread leaves and flowers through the string.
  4. To attach conkers, I pierced a hole through the fruit to thread jewellery wire through and wind it onto the frame.
  5. Tie some string from two corners to create a loop to hang it from a tree in your garden at home!

How To Make A Stick Picture Frame

  • This activity is great for:
    • fine motor skills and hand-eye co-ordination; winding the string around the sticks.
    • design skills; how can we join the sticks together? Can we find items to make it look attractive?
    • communication; questioning and discussion.
    • self-esteem; achievement!
    • having FUN!

'Create some wild art' is #18 on the National Trust's list of 50 Things To Do Before You're 11&¾


Country Kids Of All Ages At Coombe Mill

We've been having the time of our lives this week in Coombe Mill. It is one of the most magical place I've ever been to. One of my happy places; all of us have it as our happy place. The photos and the words of those who write about it can never do the farm or grounds justice. Coombe Mill is more than just a farm holiday, it's about re-engaging with each other and enjoying time as a family, re-engaging with nature and the wonders of the world that we live in, and re-engaging with our lost selves during the chaos of everyday life.

Until you've experienced it, it's hard to understand Coombe Mill's magic.

That's why I was really eager to have the motley crew from Mummy Mishaps down for a day during our stay, and the fabulous Fiona was only too happy to agree and welcome them with open arms.

And we've had the best day of our holiday so far because we have stayed on site and done nothing but play. That goes for the 'grown-ups' as well as the children, even Fiona said herself that she had done nothing all day but "rediscover my own farm through the eyes of others!"

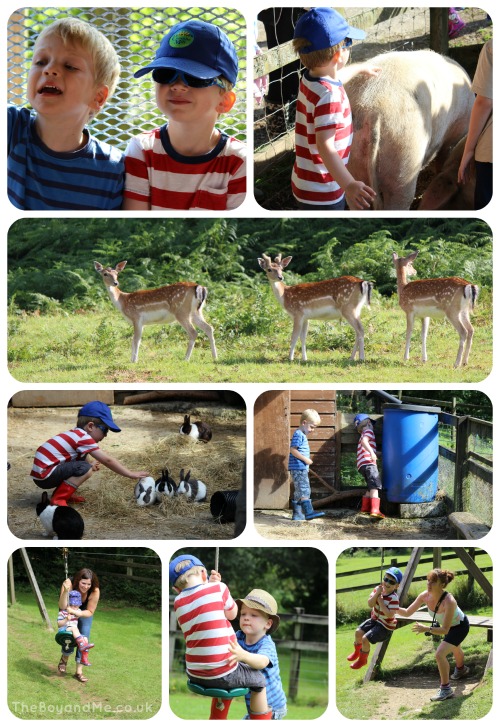
We started with the 9am feed run where the deer behaved themselves wonderfully and showed up out from the forest, and then progressed onto one of the adventure play parks having refreshed on cake and drinks at Fiona's house.

Country Kids of all ages at Coombe Mill 1

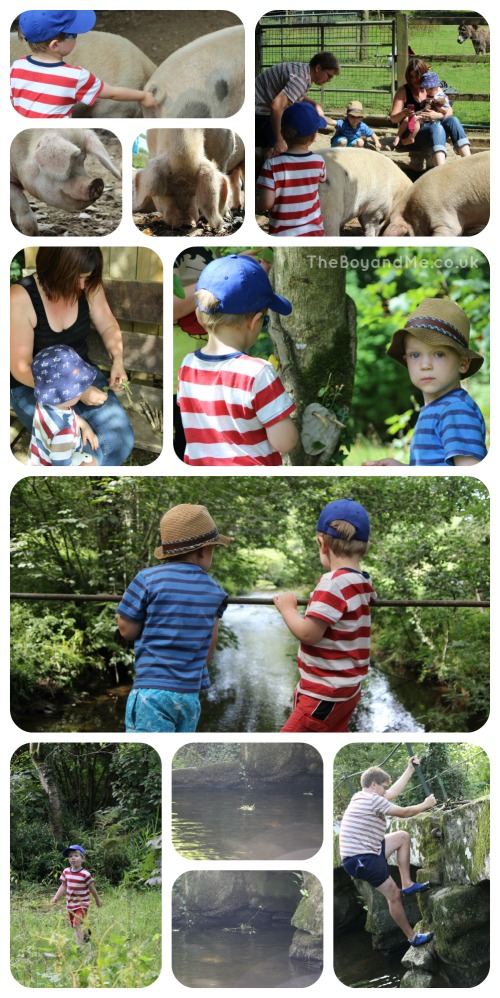
Once the zipwire was exhausted from the boys' efforts, we enjoyed a picnic on the green in front of our lodge next to the River Camel, before taking our scraps up to Dotty and Piglet. The poor things were fast asleep in their sty until I clanged the bucket at them and the promise of orange peel, bread rolls and egg shells was too great for them to stay dozing.

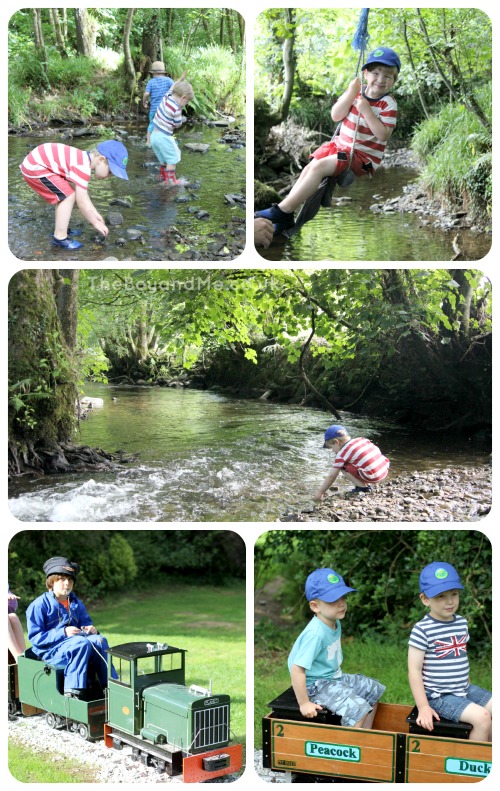
Following our own mini feed run, it was time to indulge in a spot of wood craft where we made our own stick rafts to sail down the river, and forest faces to adorn the trees of Coombe Mill before heading into the river to sail our rafts in a competition between Jenny and Mr. TBaM.

Country Kids of all ages at Coombe Mill 2

Once we'd retrieved the rafts from the river, it was time to explore the more shallow parts of the river and Coombe Mill's very own little island (in the stream). Both The Boy and Burton had a go on the rope swing hung from the tree, while we all enjoyed throwing pebbles and seeing how far they could go in the rapids!

A quick snack and shower saw all the boys dressed in clean and dry clothes with one more treat of a train ride before the Mummy Mishaps bunch had to head home. It was a marvellous day, thanks to our wonderful friends and the idyllic setting.

Country Kids of all ages at Coombe Mill 3

Jenny won by the way!

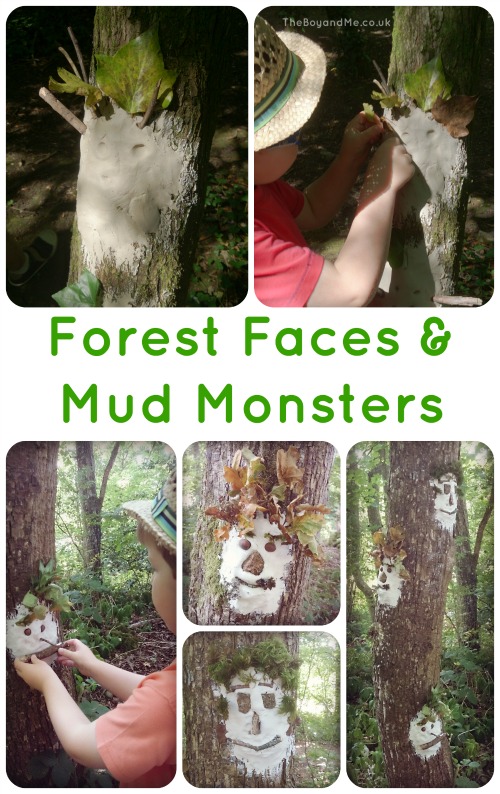
Creating Wild Art: Forest Faces

'Wild Art' is quite simply creating art or craft from the materials found in a natural environment. Making forest faces is one of the simplest and most enjoyable activities that can be done in a woodland setting. In fact, we've done this activity twice in the past week because we enjoyed it so much.

For older children, this project could be preceeded by examining the history of the 'green man' and the different variations available.

I've cheated with this slightly as I'd bought air-dry natural clay to use, however if the soil or mud is wet and clay-based then that would be the ideal base. The issue is in my area that we have a lot of limestone in the earth, so air-dry natural clay (from Hobbycraft for a few pounds) was a far more reliable option!

You'll need:

  • clay-heavy mud or air-dry natural clay (make it as unobtrusive to the environment as possible),
  • leaves,
  • moss,
  • small sticks,
  • stones,
  • acorns,
  • an easily accessible tree or rocks.
  1. I'd pre-sliced the clay into the right amount for each person, and had put it into a sandwich bag in order to make it easier to handle and stop it from beginning to dry out. Once in the right place, we removed the clay from the airtight bag and pressed it down onto the tree trunk, smoothing the edges down onto the bark.
  2. Next we gathered a selection of leaves and moss for the hair or crown of the forest face, and pressed this into the top of the head. The eyes and nose were acorns, the mouth a bent stick.
  3. This is not a project that can be removed and taken home, the faces stay on the tree so take plenty of photos for the little ones to enjoy and remember. Hopefully the faces will stay for a long time for other people to enjoy, but there is the chance they may dry out and fall off, or wash off in the rain.

Creating Wild Art: Forest Faces

#18 on the 50Things To Do Before You're 11&¾ list: Create some wild art.

country kids


My First Hama Maxi Beads (Review)

I've known of Hama beads for quite some time; when I first started teaching in 2001 the after school club used them frequently as an activity, and I will confess that occasionally I could be found skiving from my marking and making a flower badge with a child helping me out and giving me tips. I've also seen various 'compatible' brands to the more well-known Hama beads but I haven't come across any suitable for children under five years old until recently.

The problem with traditional Hama beads is that they are very small and fiddly for younger children. While they are able to pick them up fairly easily (after all they only have little fingers themselves), placing them in the correct place on the template proves more challenging for children with developing fine motor skills. The Maxi Hama Beads, which we were sent by Play Merrily, are ideal for children of The Boy's age (three-four years) because they are twice the size of the original beads, which also means that the pegs on the template aren't so difficult to use.

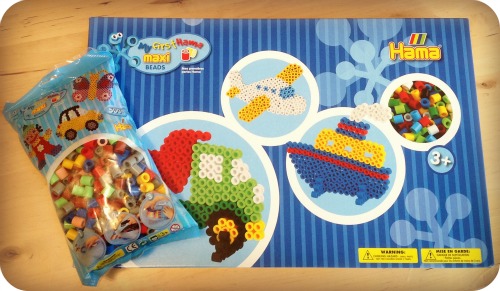
We were sent the My First Maxi Hama Beads set, along with a pack of 500 extra Maxi Hama beads in pale colour mix.

maxi hama beads

The pack contains beads in a variety of colours, and three templates to use (a lorry, an aeroplane and a boat) along with four plastic stands to display the finished artwork, ironing paper and a sheet of designs to help create the masterpieces.

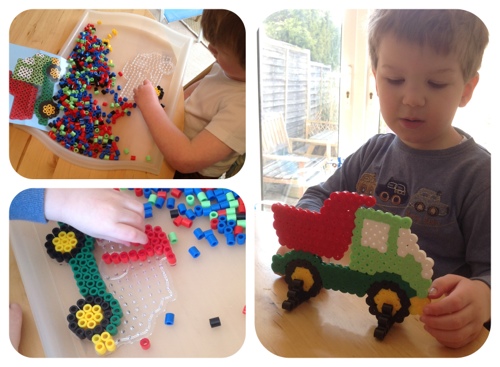
The Boy couldn't wait to get started on making one and eventually chose the lorry to start with. I placed the whole set up on a tray which meant it could be easily set aside to complete another time, the projects aren't large and they aren't complicated, three year olds have a limited attention span and I knew he wouldn't complete it in one sitting. The maxi beads are much easier to use than the traditional size, and he found no difficulty in placing them on the right peg. The added bonus in this activity is the mathematical development as he had to count out how many pegs he needed to fill with a colour, assess length and direction.

20130522-234850.jpg

On the larger patches of one colour, I did need to help him fill in those sections, but he found following the plan very easy. And it was only after two sessions of 15 minutes each that we'd finished his lorry artwork.

Of course, the choice then is whether or not to empty the template out and reuse the beads another day, or to iron them and keep the creation. We decided to keep it, and using the ironing paper I had quickly melted one side of the Hama beads, ensuring they joined together. I personally always melt both sides as I find it makes it stronger and less prone to damage, which did mean it needed to be left a little longer out of his reach to cool down. However, it creates a very sturdy 'sculpture' indeed which he loves to play with and examine.

Hama beads, especially the maxi ones, are useful in other activities too like threading with pipecleaners, which is a great fine motor-skill activity. In fact, Hama beads are a marvellous play resource to promote hand-eye co-ordination and manual dexterity. A big 'thumbs up' from us!

We were sent this product for the purpose of this review, my opinion is honest and unbiased.

How To Make An 'Under The Sea' Picture (Using Post-It Notes)

As a teacher I know only too well the worth of a sticky bit of paper for note-making. Before I had The Boy, my desk was organised with coloured Post-it notes, and they are also an excellent resource to use in lessons during collaborative discussion work.

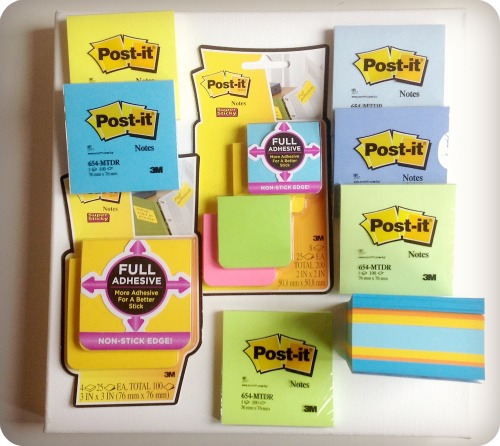
However, I'd never thought of using them to create a piece of art with The Boy until I was asked by 3M to see what I could do with their new Post-it Notes Colour Cubes, packs of Post-it Notes in a range of vibrant hues. They sent me a selection and a canvas and asked me to get creative on a "miserable rainy day when no one wants to go outside!" How fortuitous that today happened to be just one of those days.

 post-it notes colour cube

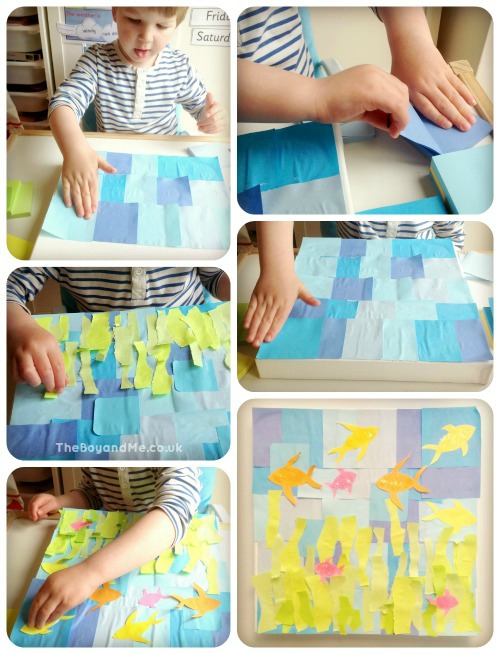
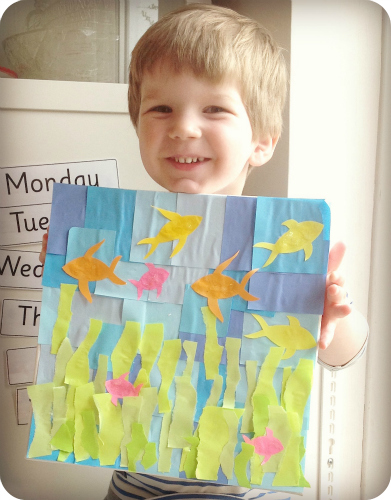
So faced with this wonderful range of bright coloured Post-it notes, mostly shades of blue, The Boy and I decided to make an 'Under The Sea' picture.

  1. First, we layered the different shades of blue all over the canvas (we did have to use a small amount of PVA glue as the canvas was the most resistant surface in the world!)
  2. We also used the smaller packs of Super Sticky fully adhesive Post-it notes to add some variation in the colours.
  3. Next we ripped up the different shades of green to make seaweed and underwater foliage and layered these from halfway down to the bottom, overlapping to add depth.
  4. Finally I used the brightly coloured pink, orange and yellow Post-it notes to create some fish, by drawing a design on the back and cutting them out. The Boy then placed these in between the leaves and swimming freely about in the water.

Post-It Notes Colour Cube
And there we have it; one canvas (or piece of card), a selection of Post-it notes in different colours, one hour and one very happy little boy.

post-it note art
If you're looking for some more ideas on creating art with sticky bits of paper, have a look at the Post-it UK Facebook page, which includes some excellent examples.

This is a sponsored post in connection with 3M.

How To Make A Snow Picture

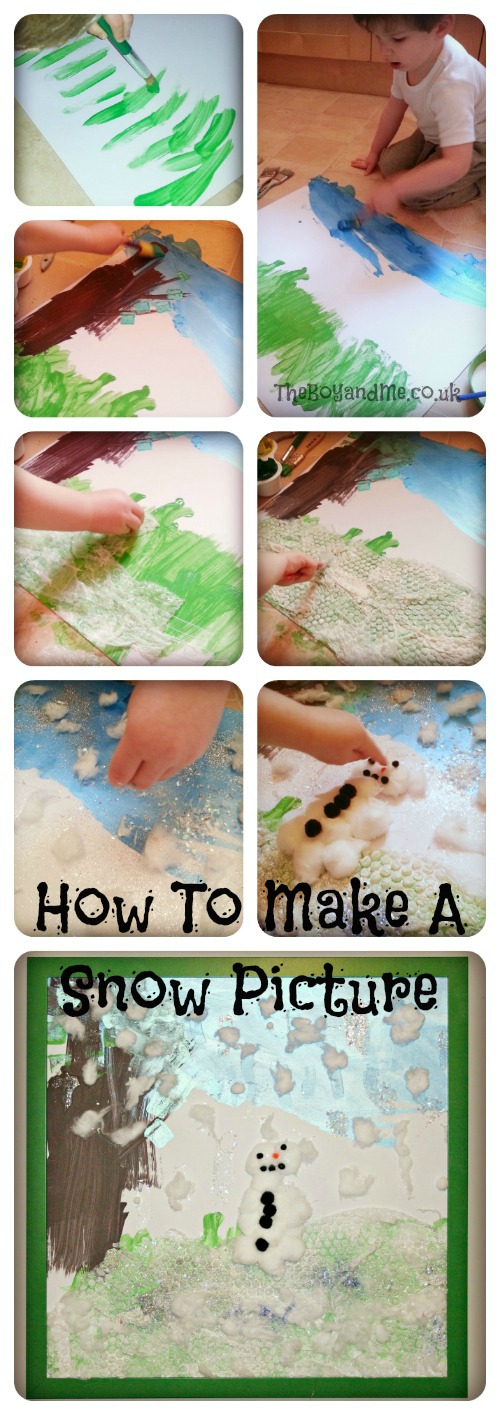
The Boy loves doing large scale art and when the snow fell earlier in the week, it was the perfect opportunity to get creative again. His recent painting sessions have shown that he is really keen to express himself artistically and so I wanted to allow him the freedom to make whatever picture he saw fit. I gave him the resources and let him get on with it.

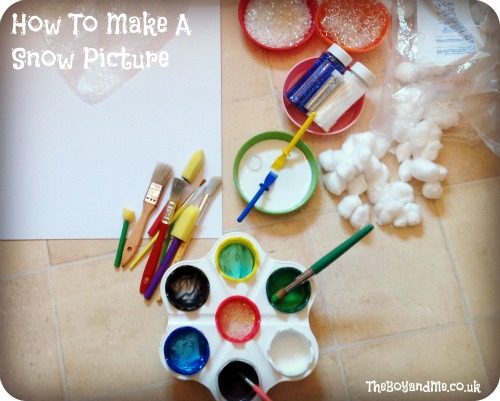
We used:

  • A2 mounting card (equally could have used a cardboard box cut up)
  • various coloured paint
  • a variety of sponges and paintbrushes of different sizes and textures
  • silver, blue and white glitter
  • cotton wool
  • metallic white, foil confetti
  • glue
  • bubble wrap
  • coloured pompoms
  • talcum powder

You could also use:

  • tissue paper
  • clear cellophane

How To Make A Snow Picture 1

It's at this point that we talked about how he could use the different materials, it was the bubble wrap that really captured his attention. We popped a load of bubbles talked about what it felt like, looked like and how when it was stretched out it looked like a load of balls. At this point it was laid over the card and The Boy commented on how it looked like snow balls. He decided to paint a garden scene (is this one of the first pictures that they like to paint at this age? It's his most common scene for paintings!) and he set to painting with the grass and the sky.

The thing that often amuses me about infant painting is the way that the sky never reaches the ground, to them it's way above their heads and as they can't see the blue around them why would they paint it down there? The other thing that amazes me is how The Boy has always painted grass as blades of grass, never once has he painted a swishy mass for the ground. He normally wants to paint mud but was distracted on this occasion!

How To Make A Snow Picture

I framed it using a child-friendly picture frame from Ikea which has plastic 'glass' (although I've actually left this out because the painting is so 3D), and I've hung it in The Boy's bedroom for him to enjoy. As the seasons change, we'll do an updated picture to reflect the changes in nature.

Days 20-26 of Project 365 (Country Kids)

20-26 of 365

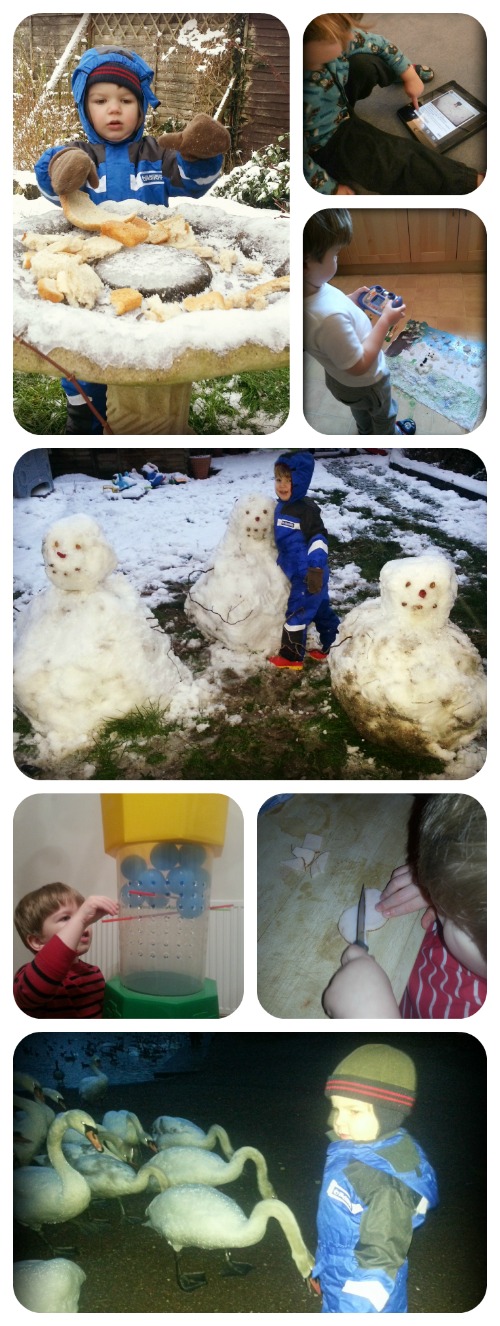
20. 'Birdman' (Yes we had a snowball fight but who wants another picture of that? We spent time on Sunday putting out food for the pair of blackbirds and Mistlethrush which we have in the garden. The fatballs had frozen so needed crushing, and we had half a loaf of bread to distribute. The Boy then spent ten minutes calling them, before going inside to wait at the window for them.)

21. 'Heart-pressing' (The Boy is obsessed with Instagram. 50% of the likes you'll see from the little green bug are actually done by him, he particularly likes seeing pictures of other children playing and I have to tell him who they are. Daily I have to look for photos of Jenny, Burton and Jenson; think we need another playdate. If your photo on Instagram is of a child and I've liked it, it'll be him. If it's got a comment or of food, it'll be me liking it!)

22. 'Artist At Work' (We spend a long time making the most amazing snow picture today; 95% of it was done by him – the 5% done by me was the gluing because he's a lazy tyke! He then wanted to take a photograph of it because he was so proud of it.)

23. 'Meet The Family' (I was incredibly disappointed today to discover that, despite two inches of snow falling on compacted snow and ice, school was not closed. I made my way in to my job, but was out of there by 3.45. At 4pm we were making snowmen in the garden! I'm on the left, Mr. TBaM is in the middle and The Boy is on the right.)

24: 'Now, Which One?' (This giant Kerplunk we had for review a few months ago, is still one of the most played games in the house! Problem is that now he's cottoned on that he needs the least amount of balls to win, and is very competitive!)

25: 'Eat Your Heart Out, Gordon!' (Uninspiring photograph, but it's a milestone snap. The Boy made his own tea tonight: pizza pocket. He cut the pitta bread in half, sliced up the chicken and grated the cheese himself, before stuffing them in the pitta pocket. And yes that's a sharp Kitchen Devil vegetable knife. Give a child the correct tools to use – under supervision – from the start otherwise they just need to be retaught. He'd be more likely to cut himself with a blunt knife as the knife would slip!)

26: 'Birdies, NO!' (Today has been a non-day. I hate days like this; slow to start and before you know it, the weather has turned and the light's almost gone. They affect my mood greatly, pyjama days on a weekend do not help the happy family way of life for us! All too late in the day we went to feed the swans at the local country park, they must have been starving because as soon as we walked towards them and they spotted the bag of bread, they were out the water and coming! To me, it was something like a horror movie, The Boy took it in his stride, and Mr. TBaM stood there telling them off for pecking his bottom! Nutter! The Boy then made us go for a walk in the pitch-black around the lakes, luckily we had our torches!)

My favourite photo this week is Day 20: 'Birdman'

TheBoyandMe's 365 Linky

coombe mill
MWTWbadge

Related Posts Plugin for WordPress, Blogger...