Spicy Apple & Pumpkin Cake

When we became way too excited at the PYO Pumpkin Farm in October, I was left with a fair few pumpkins to do something with. Fourteen to be precise.

Like I said, I was excited.

I pureed and froze quite a few of them, we've eaten one or two in lasagnes or risottos, but I decided to bake a cake with one to see exactly what pumpkin cake tastes like. As the puree is quite bland, I decided to add apple in for texture  combining a number of spices to add extra zing!

Spicy Apple & Pumpkin Cake

  • Makes: 8 inch bündt cake
  • Preparation time: 10 minutes
  • Cooking time: 35-40 minutes

Ingredients:

  • 6oz/170g self-raising flour
  • 6oz/170g caster sugar
  • 6oz/170g butter
  • 3 eggs
  • 1tsp vanilla bean paste
  • 1tsp each of cinnamon, nutmeg and mixed spice
  • 200g of pumpkin puree
  • 2 apples, peeled and chopped
  • demerara sugar to decorate
  1. Cream the butter and sugar together until light and fluffy. Stir in the eggs one at a time, adding a little flour if they start to curdle.
  2. Add the flour and spices and mix together thoroughly.
  3. Fold in the pumpkin puree and chopped apple.
  4. Pour into the bündt tin and cook in a preheated oven (180°C/Gas Mask 4) for 35-40 minutes until a skewer comes out clean.
  5. Allow to cool in the bündt tin before turning out.
  6. Sprinkle demerara sugar on top to decorate. Spicy Apple & Pumpkin Cake
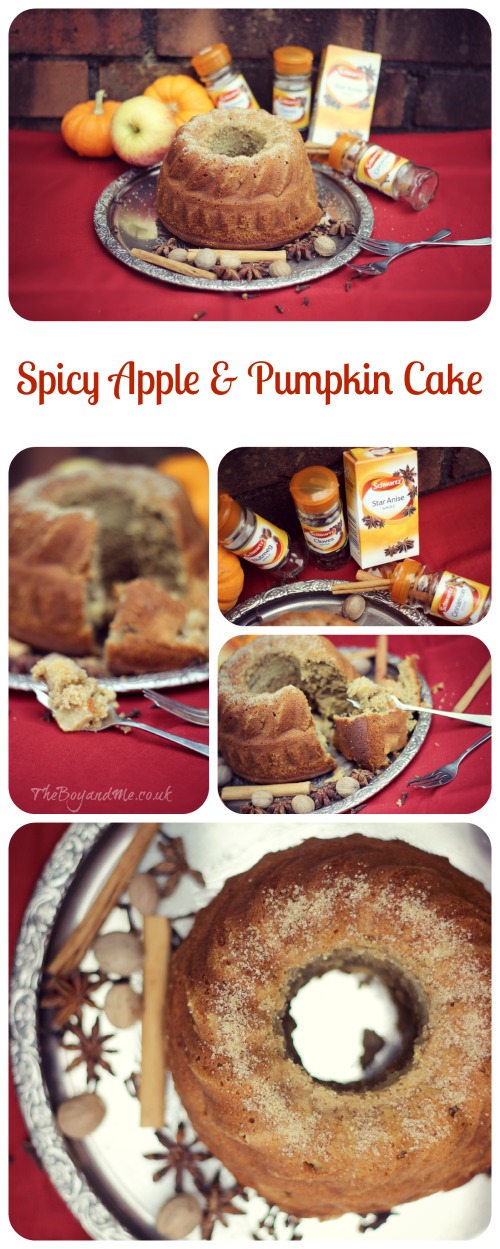
Apples and mixed spices are one of my favourite combinations when it comes to cakes, there are plenty of spicy cake recipes around for inspiration at this time of year.

Recipe written in collaboration with Schwartz

Linking to Recipe Of The Week and Tasty Tuesdays
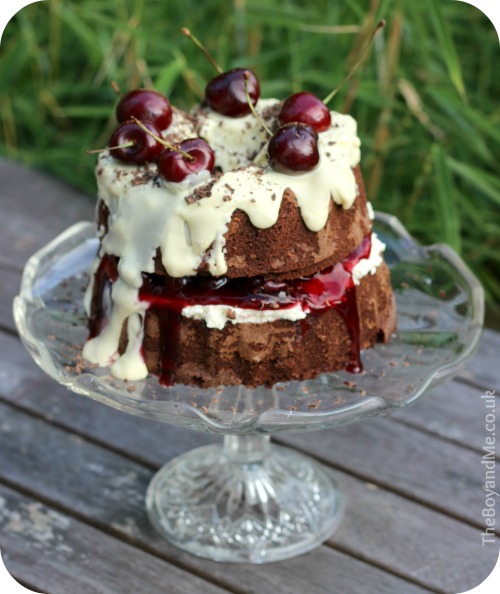
Blackforest Gateau

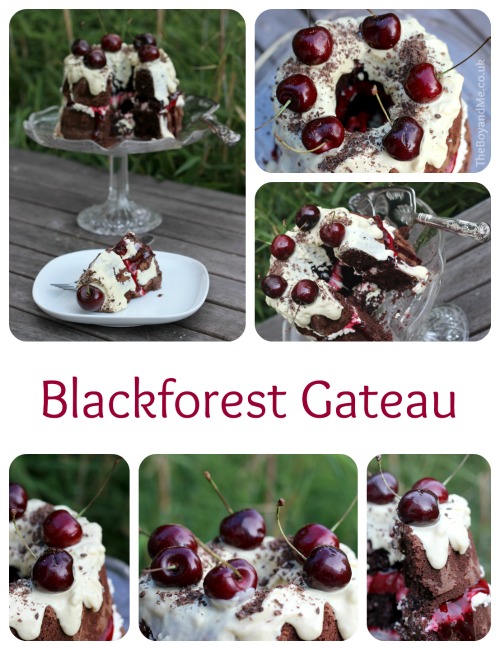
I have a long history of failing to make 'big' cakes in my oven, but when I saw a recipe for a ring cake I remembered that I have a Bundt tin and I decided to have a go at making a cake for my dad's birthday. What else could I make for a man who thinks the 1970s were the best decade ever than a blackforest gateau, but 21st century style.

Blackforest Gateau

Blackforest Gateau

  • Preparation time: 20 minutes
  • Cooking time: 25-35 minutes
  • Serves 8-10

Ingredients:

  • 200g (7oz) softened butter
  • 200g (7oz) golden caster sugar
  • 4 large eggs, beaten
  • 150g (50z) self-raising flour
  • 50g (2oz) cocoa powder
  • ½tsp baking powder
  • 1tsp vanilla bean paste
  • 4tbsp kirsch or brandy (optional and should be omitted if the cake is being given to a minor)
  • 4tbsp cherry pie filling
  • 150ml double cream
  • 1tbsp icing sugar
  • fresh cherries (with the stalks still on if possible)
  • bar of white chocolate
  • dark chocolate curls
  • You'll also need a 20cm (8inch) Bundt tin, well greased and floured (I actually then put mine in the fridge as it was a warm day and the butter was melting through the flour.)
  1. Heat the oven to 180°C/160°C fan, 350°F, gas mark 4.
  2. Beat the butter and golden sugar in a bowl until smooth and creamy. Gradually beat in the eggs, a little at a time, adding flour if the mixture starts to curdle. Stir through the vanilla bean paste.
  3. Sieve in the flour, cocoa and baking powder and beat gently until smooth.
  4. Spoon the mixture into the tin and level the surface. Bake for 25-35 minutes until firm and well risen, test with a skewer which should come out clean.
  5. Place the cake in the tin onto a wire rack to cool. When cool (and not before or the cake will fall apart!) turn upside down and remove from the tin.
  6. Measure a line around the circumference of the cake halfway up the height, and carefully slice through this to have a top and bottom half.
  7. Whip the double cream up until stiff and it holds its shape. Stir through the icing sugar to sweeten. Spread this onto the bottom half of the ring, and spoon the cherry pie filling onto the top of this. Place the top half of the cake back on top.
  8. Melt the white chocolate in a bain marie (or in a bowl over boiling hot water, it shouldn't touch the water). Pour the chocolate over the top of the cake allowing it to dribble down the sides and hole to create. Place the cherries on top, and put the cake in the fridge to set.
  9. Once almost set, sprinkle the dark chocolate flakes on top (if this is done when the white chocolate is still warm, it will melt into it). Return to the fridge to set the white chocolate.

Blackforest Gateau

Mummy Mishaps

Days 160-166 of Project 365

160-166 of 365

160. Ground Force! (Little did The Boy know that the groundwork that he and daddy were doing on Sunday was for the area that his climbing frame – his birthday present – is destined for. We've done some relocation work of some fairly permanent features to accommodate the frame, this area used to be a patio which housed his Little Tikes house.)

161. Retro (The four eyebrows and tongue of concentration make a reappearance in this photo. I'd bought him one of those snake twisty things (that could make telephones and balls and stuff) that were all the rage in the 80s and he was absolutely fascinated with it.)

162. Shadow (Today was one of those deceptive days where it seemed mild and cloudy, yet when the wind blew the clouds away, the heat was extradordinary. We had to do a lot of shopping for his birthday party and as he'd been such a good boy we went up to the clifftop park. It's very peaceful up there looking over the Bristol Channel, and the skies cleared to reveal a scorching heat and the most amazing late-afternoon shadows.)

163. Surprise! (The Boy's birthday! Unfortunately I had to work, as did Mr. TBaM. This is a new one for us on The Boy's birthday as I'm usually off work, Mr. TBaM takes the day off and we have a family treat day out somewhere, but not this year and it made me sad. However, I raised home from work and we led The Boy into the garden with his eyes covered by his woolly hat. This photo was taken the very moment that he whipped it off to reveal his birthday present; a climbing frame.)

164. Adventurer (The climbing frame is going to play a huge part in our play I suspect! His confidence has grown in just one day from slowly stumbling from one rung to another of the jungle run, to walking over and barely holding on!)

165. Monkey Boy (I wondered when he'd discover the monkey bar aspect to the jungle run, it seems it was to be today. He's swinging from a single bar, he can't move himself onto the next rung yet, but he is enjoying hooking his legs over the frame – to take the weight – and moving his hands along to the next rung. He's certainly building his technique though.)

166. Blow (Today was the big day, The Boy's Pirate Party. Up to goodness knows what time last night baking a cake, decorating it at 7.30 this morning, running around like a blue-arsed fly all morning, and it all paid off as the party went brilliantly. It did rain for the first hour, but stopped and brightened during lunch. They were able to get outside and play – on the climbing frame – once the birthday cake had happened.)

TheBoyandMe's 365 Linky
akiltandacamera.com

How Not To Make A Birthday Cake (Or The Biggest Cake Fail Ever!)

2

Look alright, doesn't it?

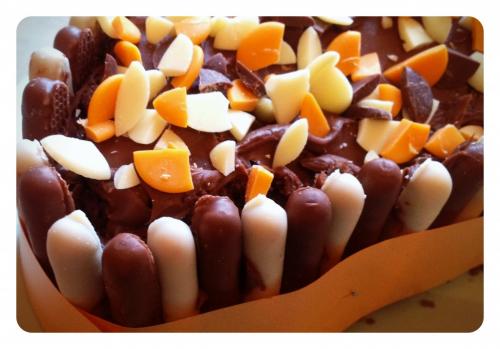
However, it looks vastly different to what it was meant to look like. It was meant to look a little like these crafted by my talented friend Jenny from Mummy Mishaps

mummy mishaps cakes

I gathered my ingredients, two sandwich baking tins, two packets of chocolate fingers (white chocolate and milk chocolate) and the packet of red, white, and blue peanut M&Ms to top the cake, and got mixing.

All was going well! The two cakes went in the oven at the lower temperature of 170°C (as instructed by Jenny who told me off for baking them at 200°C), and I set the timer for 25 minutes.

And then I adjusted it for another 15 minutes as the middle was wiggly still.

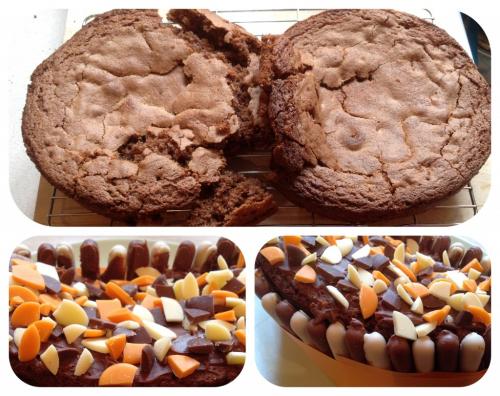
But opening the door to check it, made it sink in the middle so I ended up with two very concave sponges.

Which fell apart when I tried to get them out of the baking tins.

Literally broke in to five pieces.

And that's five per cake.

Out came the two tubs of chocolate Philadelphia which I was going to use as the filling and frosting, and I started to use them as glue.

Only the cake fell apart as I prodded the 'glue' on it with a knife.

So I bunged the top on quickly, and set to surrounding the outside with chocolate fingers, again using the chocolate Philadelphia as glue.

I ignored the fact that it was lopsided.

Or that the edges were falling off.

Or that the middle was 2 cm lower than the outside.

The chocolate fingers fell off halfway around.

By which time I was quite pissed off, to be blunt. I hacked the bloody thing in half, grabbed the orange ribbon from my last bunch of flowers from Mr. TBaM, wrapped it around the cake and then couldn't fathom out how to hold it in place.

Dressmaking pins, that'll work!

Then the M&Ms were out of date.

BY FIVE MONTHS!

1

This is why I make cupcakes.

Happy birthday Mr. TBaM!

Sandcastle Birthday Cake

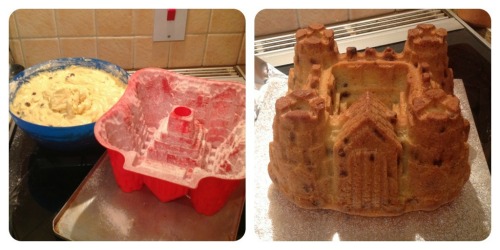
A month or so ago I bought a silicon cake mould from Aldi in the shape of a sandcastle. At only £3.99 I couldn't not buy it, even though I had no idea what I was going to use it for; I'd already decided on The Boy's birthday cake and had no idea what this one could be used for.

In the end I decided to use it for The Boy's family birthday party today. I've never used a silicon cake mould before and was nervous. I was also a bit nervous because of the size of the mould and had no idea how much mixture would be needed. After a helpful tweet from Clare at Seasider In The City pointing me in the direction of this post, I discovered I'd need 9 eggs and 18 ounces of flour for the madeira cake!

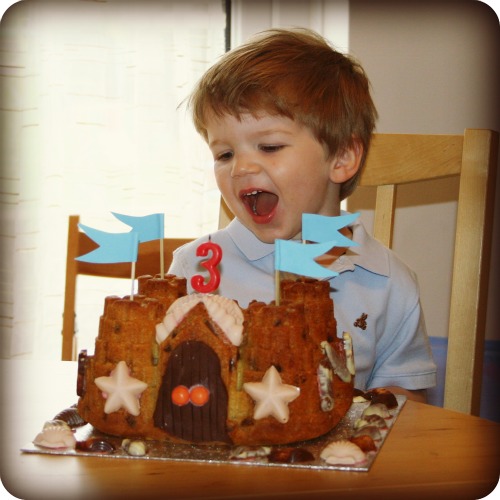
Luckily it only took an hour and half to cook, and peeled out of the mould really easily. Today while The Boy was napping, I decorated it with some simply shell-shape chocolates.

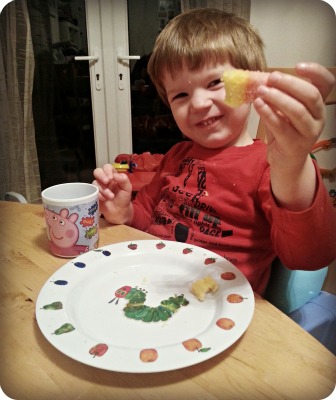
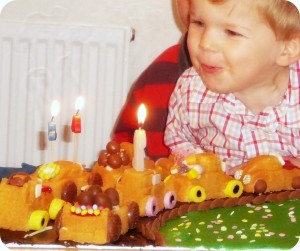
I was sceptical that it looked ok, but The Boy was more than happy with it. Look at his little face when he saw the cake mummy made him:
Mint Chocolate Birthday Cake

Today was Mr. TheBoyandMe's birthday. 37. He's getting old now but refuses to admit that he is now in his late 30s.

I digress.

We decided to make him a birthday cake, and as The Boy has an obsession with chocolate cake (thanks Peppa Pig) and that Mr. TBaM's favourite flavour is mint chocolate, I decided to have a go at making a mint chocolate cake.

I used the basic Mrs. Beeton's Victoria Sandwich recipe of 5oz butter/self-raising flour/caster sugar and 3 eggs, and added two sachets of mint flavoured drinking chocolate to the mix. I also added a teaspoon of baking powder as my sponge cakes don't tend to rise very much. (It still didn't, but I'm now beginning to wonder if that's more about my oven than anything else.

We made the cake yesterday and then wrapped it in tin foil once cooled.

Then this morning while hubby was sleeping soundly (because I am a good wife and Mr. TBaM never seems to get lie-ins anymore, so I let him), The Boy and I did the filling and topping. We made a form of buttercream using unsalted butter, icing sugar and chocolate philadelphia (which is yummy). However, in hindsight I needed to add more icing sugar because it was a little too fluid.

Once that was spread on and the cake had been put in the fridge for it to set a little, I melted down chocolate to put on the top. We smoothed this around roughly and then sprinkled over a variety of toppings, including; crushed mint Aero, chocolate flake and white chocolate stars.

The finished cake was incredibly yummy, although very difficult to cut due to rock solid chocolate on the top and slippy buttercream filling! But Mr. TheBoyandMe was happy!

Baker Man, Baker Man

The Boy and Me (I never tire of that little joke) have made crispie cakes a few times now, but we're yet to make proper cakes with icky stuff that could go all wrong and everything. That was until Sunday when I decided to take the bull by the horn and just do it. Spurred on by the 'I Love Cake' linky over on Mummy Mishaps, with Jenny having thrown the gauntlet down, I went for it.

Therefore, I present you with our simple cupcake recipe. Please bear with us, one of us is a complete novice, and the other can't stand the sight of eggs.

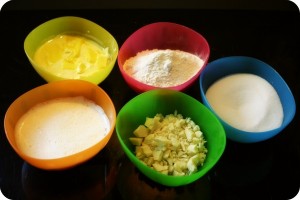
1. 4oz of self-raising flour, butter, caster sugar, 2 eggs and half a bar of white chocolate roughly chopped.

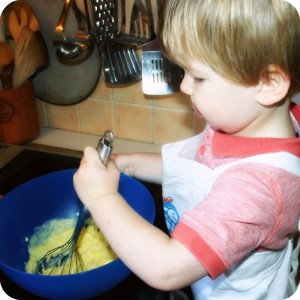
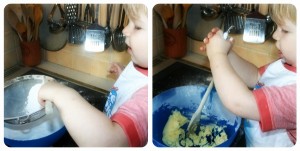
2. Add the butter and sugar and mix together. We used a balloon whisk.

3. Add the eggs and mix together. If it starts to curdle, add a small amount of flour. If you're two, try not to pour a third of the egg mix over the counter top as your mummy will feel sick having to clean it up.

4. Add the remainder of the flour and mix together. Then gently stir in the white chocolate.

5. Set out the cake cases into the baking tray.

6. Spoon the mixture into the cake cases. Get your mummy to help with this because it's very twikky to do!

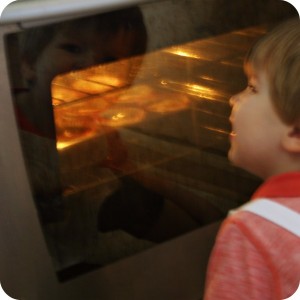
7. Sit and watch the cakes cooking in the very hot oven for 12 minutes at 180°C.

8. If you get bored, because 12 minutes is a long time, then make the buttercream. Sift 9oz of icing sugar into a bowl and all over the work surface. Add to this some softened butter, the other half a bar of white chocolate which your mummy had melted, and some blue food colouring because you're two and you can. Mix together really well.

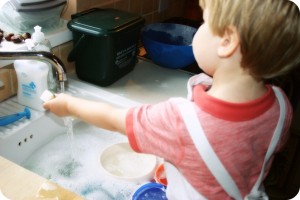
9. While the cakes are cooking, do the washing up. Every good cook does this, except that Gordon Ramsey fellow.

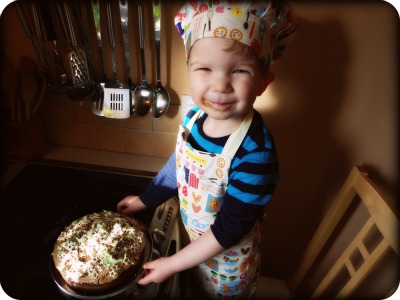
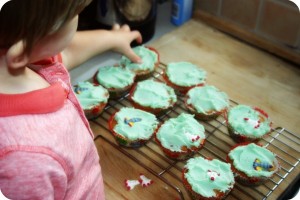
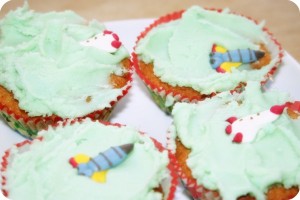
10. When the cakes are cool, spread the now green buttercream all over them and place rocket sugarcraft decorations on top. Try not to eat more than half of them because otherwise your mummy will have to open another packet!

The finished product: White chocolate cupcakes!

Not bad for our first attempt!

I'm linking this up to Mummy Mishaps 'I Love Cake' linky. Click on the badge below to go and check out the other entries!

I Love Cake