Gingy's Makeover
Last year my dad bought one of those gingerbread house kits from that well known Scandinavian shop. He was really excited to make it for all the tiddlers in the family. He got home, opened up the kit and inside were the sides and the roof. That was it. None of the decorations were in the box, and forgive me for thinking so, but I do think if something being sold as a kit then the vast majority of the components need to be there. He went and spent £15 on the icing sugar and decorations for the gingerbread house.
Oh and because the pieces were so hard and brittle and the flimsy box had been on a big crate, one of the sides was broken. He wasn't a happy bunny.
We've recently been sent this gingerbread house kit (by Bespoke Foods) to review:

A 'kit' it is indeed, because everything you see in the picture is included in the box. I mean everything; the soft and thick gingerbread, the icing sugar (pre-mixed in a piping bag, snip off the end to use), smarties and even a little sugarcraft Father Christmas to put on the porch!
This would be a marvellous activity for your not-so-little ones to do in the run-up to Christmas; I suspect that Mr. TheBoyandMe and I will have great fun making the house for The Boy to decorate. And on Christmas Day (if it lasts that long), it's going to taste delicious as we do an impression of the Big Bad Wolf.
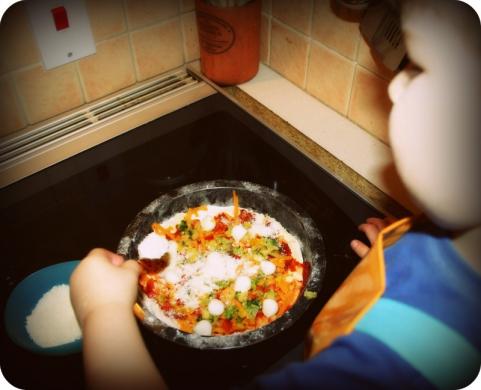
We were also sent Bespoke Foods Gingerbread Man kit and didn't waste any time in decorating Gingy. The Boy had the most fabulous time, although he did need help to squeeze the icing out.

Christmas is also a time to spend playing board games with your family. Usually these end up in sulking and tantrums, and that's just from the grandparents. What if the game you were playing involved chocolate counters? Bespoke Foods have a range of traditional family board games involving chocolate money or counters, Twister is just one of them.

"For family fun that will tie even the most flexible up in knots, Twister’s Chocolate Edition adds a sweeter dimension to Christmas. Perfect for parties of all ages, the rules are easy – pick your move, twist and win chocolate!"
With the festive season fast approaching, Bespoke Foods’ traditional gifts are the perfect stocking fillers to add a creative twist to your Christmas shopping list.
Chocolate Twister (RRP from £10.00), Gingerbread House Kit (RRP from £12.50) and Gingerbread Man (RRP from £6) are available to purchase from a range of department and independent stores (Debenhams, House of Fraser, Heals, Bentalls, Selfridges and Amazon)
We were sent these items for the purpose of the review. My opinion is honest and unbiased.
My Husband's New Favourite Toy
Hallowe'en: Devil's Cakes
When the lovely Jenny from Mummy Mishaps announced that her next 'I Love Cake' linky was going to be cakes for Hallowe'en I started to have a think. The toddler group that we belong to is having a Hallowe'en party and I'll need to take a plate of party food along so I decided to kill two birds with one stone: practise my cakes for the party and link up to 'I Love Cake' at the same time.
I decided on Red Velvet cupcakes. When I was looking for recipes I was intrigued by a couple of things. First of all, it's not just a sponge with red colouring in it. The colouring is achieved through mixing red food colouring with cocoa powder, and then added to the initial wet ingredients. I thought vinegar was a weird thing to put in but according to the never-wrong Wikipedia: "the reaction of acidic vinegar and buttermilk tends to better reveal the red anthocyanin in the cocoa". That's interesting thought I! Then I read on further and discovered that Devil's Food cake (a type of chocolate cake) and Red Velvet cakes often get mixed up in recipe books.
Perfect! I'm making me some Devil's Cakes!
Ingredients:
- 60g room temperature butter
- 150g caster sugar
- 1 egg
- 10g cocoa powder
- 20ml red food colouring
- 20ml black food colouring
- 1½tsp vanilla extract
- 120ml buttermilk
- 150g plain flour
- ½tsp salt
- ½tsp bicarbonate of soda
- 1½tsp of white wine vinegar
- chocolate spread
- strawberry jam
- milk chocolate
- orange & black vermicelli

1. Cream butter and sugar, then add the egg and mix together.
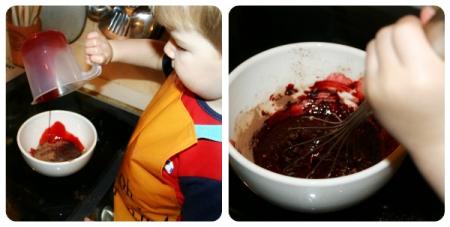
2. In a separate bowl, mix the cocoa powder, red food colouring and vanilla essence to make a thick, dark paste.
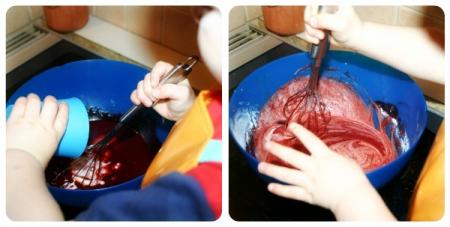
3. Add to the butter mix and stir in thoroughly.
4. Add half the buttermilk and beat. Then add half the flour and mix in. Repeat until all is used.

5. This is a really cool science bit: add the salt, bicarbonate of soda and vinegar. Watch it fizz! Beat well until really smooth.
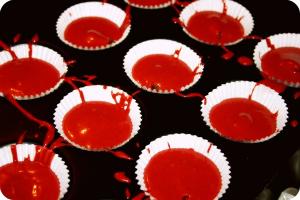
6. Put a spoonful of cake mixture into the cases, enough to cover the base. Place a small amount of chocolate spread in the centre of each one, and then pour another spoonful of mixture on top; enough to fill two-thirds of the case.
(As I had spare mixture from the 12 that it's supposed to make, I wanted to see what it would like as a black cake. I added a further 20ml of black food colouring (Asda sells it) and put jam in the middle instead of chocolate spread)
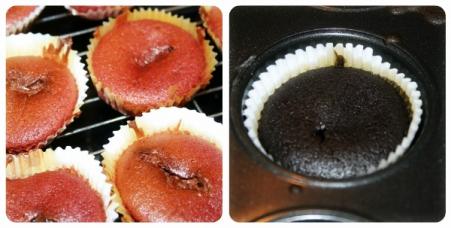
7. Bake for 20-25 minutes in a pre-heated oven (170°C).
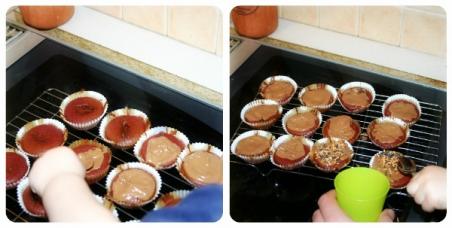
8. Melt some milk chocolate in a bain marie and pour into the centre of the cake. Smooth over to cover the top and then sprinkle some vermicelli on the top.
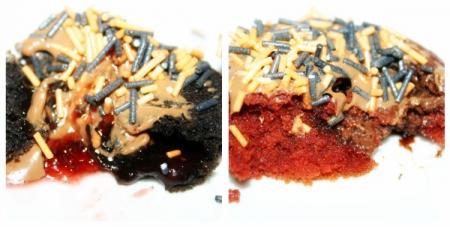 9. ENJOY!

—
Pop over and see the other entries into 'I Love Cake': The Hallowe'en Edition using this widget thing below. The linky will be open from Saturday 15th October and will close at the end of the witching hour (ie. Midnight) on Halloween itself Monday 31st October.
A Drizzle of Honey
The Boy and I have been making cakes again. He loves it so much and is getting so good at mixing the ingredients together, he's really got the hang on holding onto the bowl while whisking and stirring. I used to love cooking with my mum when I was little, and I want him to enjoy cooking so that I've raised a self-sufficient son!
So today's really simple (but very scrummy recipe) is:
Honey and Raisin Cupcakes
- 4oz self-raising flour
- 4oz butter
- 4oz caster sugar
- 2 eggs
- couple of handfuls of raisins
- squeeze of Beech Forest HoneyDew

Cream the butter and sugar together until smooth.

Whisk in the eggs, adding a little flour if it starts to curdle.
Add the flour and mix.

Fold in the raisins.
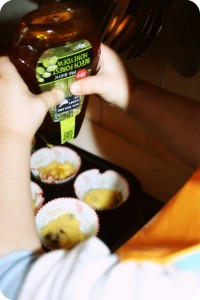
Put a spoonful of cake mix into each case (enough to cover the base) and then drizzle some honey on top. Put another small spoonful of cake mix on top.
Bake for 20 minutes at 170°C.
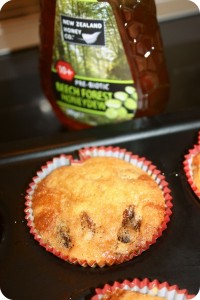
Remove from oven and while still hot drizzle honey over the top. It will soak into the top of the cake, leaving a crispy residue.

Enjoy while still warm!
We were sent a squeezy bottle of New Zealand Honey Co.'s Beech Forest Honeydew to review. It made scrummy cakes and our tastebuds opinion is unbiased and honest.
—
I've added this to Reluctant Housedad's 'Recipe Shed' linky (where the theme is Bakes and Cakes) and to The Crazy Kitchen's 'Cooking With Your Toddler' linky.


ShowOff ShowCase: The One About Food
There seems to be a tsunami of food posts around at the moment! Linkies, competitions, recipes. You name it, most bloggers have got one or two posts in the past few weeks to do with culinary delights.
Being the type of person who hates to miss out on anything, I thought I'd jump on the bandwagon and choose 'food' as this fortnight's theme for ShowOff ShowCase. However, it doesn't have to be recipe to rival Mrs. Beeton or Mr. Ramsey; it could be a tale of food, a memorable meal, a humourous tale involving shellfish or sweetcorn.
Dig out your old posts that meet the very vague criteria, whack my badge at the bottom and link it up. See if other people enjoy your experiments of being a Fanny or a Heston.
Go on, for this is The One About Food!

Courgette and Chocolate Cake
Last Summer I went to a picnic meet-up with my baby and toddler group. One of the mums had brought along a courgette cake which I wasn't at all keen on trying, but actually tasted really nice. I've had it at her house a few times since and it is really quite scrummy. The one thing that I noticed it is that although it's moist, it is actually quite bland. The courgette doesn't really come through and therefore the cake just tastes of, well, cake.
I decided to have a go at making this with The Boy this morning, and had the idea of adding chocolate to give a contrasting flavour. I knew I had the ingredients and there were courgettes waiting to be used up in the fridge. Only, they'd gone too far and had to go into the compost, which is when Mr. TheBoyandMe was despatched to pick up more!
Courgette & Chocolate Cake

Ingredients: 220g plain or wholewheat flour, 2 teaspoons ground cinnamon, 1 teaspoon salt, 1 teaspoon bicarbonate of soda, 1 teaspoon mixed spice, ½ teaspoon baking powder, 250g sugar, 200ml vegetable oil, 60g of butter, 3 eggs, 1 tablespoon vanilla extract, 2 medium courgettes coarsely grated, 1 large handful raisins, half a bar of milk chocolate, handful of chocolate chips.
Prior to cooking sprinkle a teaspoon of salt into the courgette, place in a sieve over a bowl with a piece of kitchen towel and a plate on top to weigh it down. The excess juice from the courgette will be removed.
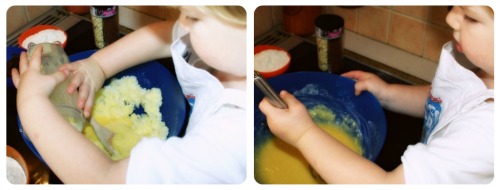
1. Cream the butter and sugar together.
2. Add the egg with a little flour to prevent curdling.
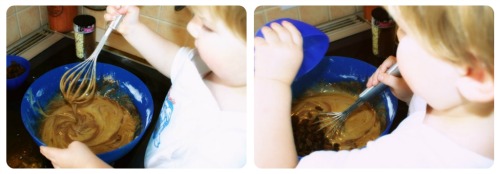
3. Add the remainder of the flour and whisk.
4. Add the oil and vanilla essence and mix together thoroughly, the mixture will be runny.
5. Stir in the remainder of the dry ingredients and the raisins.
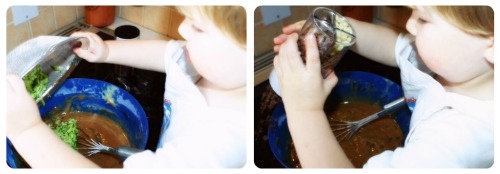
6. Gently fold in the courgettes and chocolate chips, along with the melted chocolate.
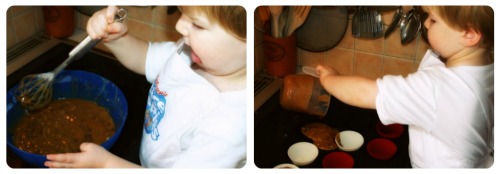
7. Mix thoroughly and then divide between cake cases. This recipe made 20 individual cakes.
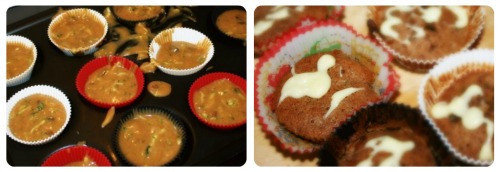
8. Place the cakes in a preheated oven at 150°C for 30 minutes until a skewer comes out clean.
9. We drizzled white chocolate on ours to add some colour.
These cakes are moist and really tasty. The Boy and Me (ha!) made them before Chef Brother came over to see us, and I was nervous about giving him one. He said they were really tasty and would be perfect for Christmas time, he then ate two! Wahoo, thumbs up if ever there was one.
The irony is that The Boy doesn't like them!
Sunday 25th September 2011 – 'Close-Up' (267/365)

Mango & Coconut Paneer
Recently there seems to be cookery going on all around me. Not in real-life™ you understand, that would involve more effort than reheating something from the freezer.
Now I've resisted taking part too much because I am neither a Nigella or a Fanny (steady on), but I'm getting swept along with the tide. With the onset of Autumn and the swiftly arriving Winter, I feel the need for home-cooked goodness.
Without much further ado, I present to you (fitting into the theme of spices for the Recipe Shed):
Mango & Coconut Paneer
Ingredients:
- 2 tbspmango chutney
- paneer – cut into cubes
- baby carrots
- broccoli
- sweet potato
- 4 tbsp olive oil
- 1 tsp each of paprika, chilli powder and coriander
- coconut milk
- basmati rice

1. Prep baby carrots, small florets of broccoli and cubes of sweet potato. Par-boil for 10 minutes.
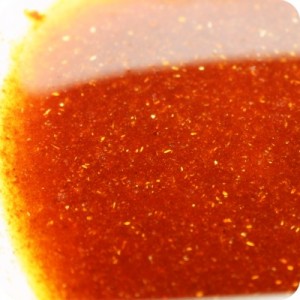
2. Mix together 4 tablespoons of olive oil, a teaspoon each of paprika, chilli powder and coriander. Cube the paneer and marinade for ten-twenty minutes.
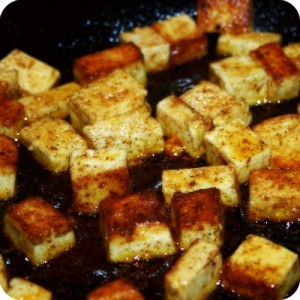
3. Pour the paneer mixture into a hot frying pan and cook on a medium heat until the paneer is brown and crispy on all sides.
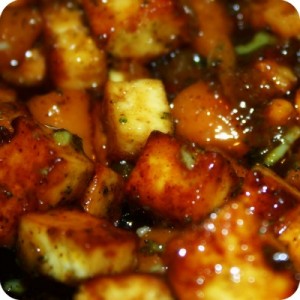
4. Add the par-boiled vegetables and lightly fry. Spoon in 2 tablespoons of mango chutney and simmer on a low heat. Pour in half a can of coconut milk and reduce down.

5. Meanwhile, open a packet of Tilda Basmati rice (because I am incapable of cooking rice without it turning to sticky stodge!) and cook in the microwave for 2 minutes. The rice will be light, fluffy and actually be separate grains of rice (as opposed to when I cook rice and it ends up in one mass). Why would go to all that effort when this is perfect?
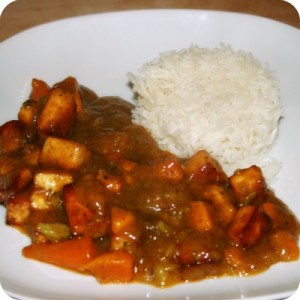
6. Spoon the rice into a mould, press down and carefully remove. Serve the paneer immediately.
YUM!
—

I was provided with the Tilda Basmati Rice for the purpose of review, my opinion is honest. I decided to kill two birds with one stone, and Keith didn't mind.
Baker Man, Baker Man
The Boy and Me (I never tire of that little joke) have made crispie cakes a few times now, but we're yet to make proper cakes with icky stuff that could go all wrong and everything. That was until Sunday when I decided to take the bull by the horn and just do it. Spurred on by the 'I Love Cake' linky over on Mummy Mishaps, with Jenny having thrown the gauntlet down, I went for it.
Therefore, I present you with our simple cupcake recipe. Please bear with us, one of us is a complete novice, and the other can't stand the sight of eggs.
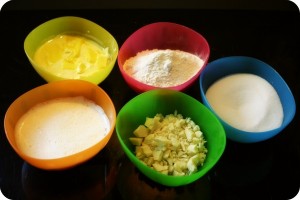
1. 4oz of self-raising flour, butter, caster sugar, 2 eggs and half a bar of white chocolate roughly chopped.

2. Add the butter and sugar and mix together. We used a balloon whisk.
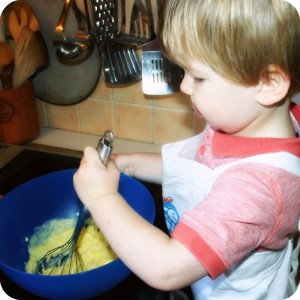
3. Add the eggs and mix together. If it starts to curdle, add a small amount of flour. If you're two, try not to pour a third of the egg mix over the counter top as your mummy will feel sick having to clean it up.
4. Add the remainder of the flour and mix together. Then gently stir in the white chocolate.

5. Set out the cake cases into the baking tray.
6. Spoon the mixture into the cake cases. Get your mummy to help with this because it's very twikky to do!
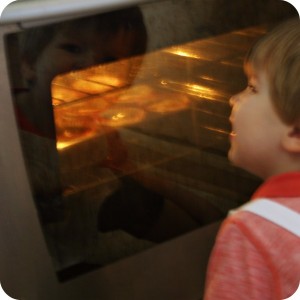
7. Sit and watch the cakes cooking in the very hot oven for 12 minutes at 180°C.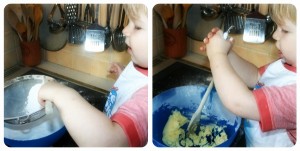
8. If you get bored, because 12 minutes is a long time, then make the buttercream. Sift 9oz of icing sugar into a bowl and all over the work surface. Add to this some softened butter, the other half a bar of white chocolate which your mummy had melted, and some blue food colouring because you're two and you can. Mix together really well.

9. While the cakes are cooking, do the washing up. Every good cook does this, except that Gordon Ramsey fellow.
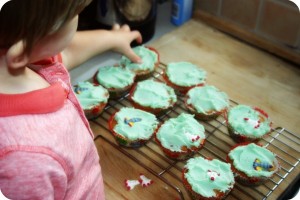
10. When the cakes are cool, spread the now green buttercream all over them and place rocket sugarcraft decorations on top. Try not to eat more than half of them because otherwise your mummy will have to open another packet!

The finished product: White chocolate cupcakes!
Not bad for our first attempt!
I'm linking this up to Mummy Mishaps 'I Love Cake' linky. Click on the badge below to go and check out the other entries!


