Oreo Cookie Cupcakes

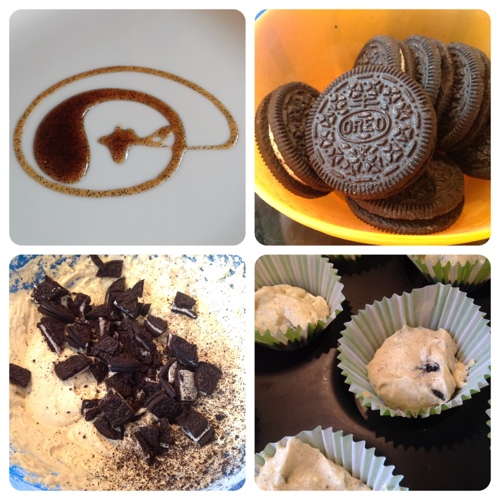
There are quite a few recipes out there that involve putting a whole Oreo cookie into each cake case, mine doesn't and I think allows for the taste and texture to vary while eating each cake.

There are two specific things that I've added to this standard cake recipe to make it taste delicious; vanilla bean paste and vanilla yoghurt.

Ingredients:

  • 4oz butter
  • 4oz caster sugar
  • 4oz self-raising flour
  • 2 eggs
  • 2 tbsp fat free vanilla yoghurt
  • 1tbsp vanilla bean paste
  • 10 Oreo cookies, chopped roughly
  • icing sugar, soft butter, vanilla bean paste and white chocolate for the buttercream.
Oreo recipes

Method:

  1. Cream the butter and sugar.
  2. Mix in the eggs, adding a little flour if it starts to curdle. Add the remainder of the flour.
  3. Whisk in the yoghurt and vanilla bean paste.
  4. With a spatula or wooden spoon, slowly stir in the chopped Oreo cookies so that they don't break up any smaller.
  5. Spoon into cake cases (this made twelve) and cook on 180 for 15-20 minutes.
  6. Leave on a wire rack to cool.
  7. To make buttercream you'll need double the amount of icing sugar as butter. I also added half a bar of white chocolate and two teaspoons of vanilla bean paste. Add more icing sugar if needed, to stiffen the mixture.

Oreo recipes

I was sent the Nielsen-Massey vanilla bean paste to test. So much easier to use than vanilla beans and more authentic than essence. I thoroughly recommend it. The recipe is my own and unbiased.

Linking up to Foodie Foto Friday
Bara Brith

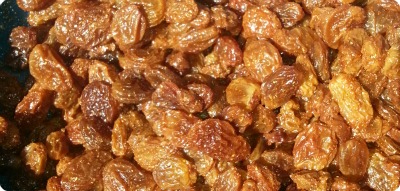
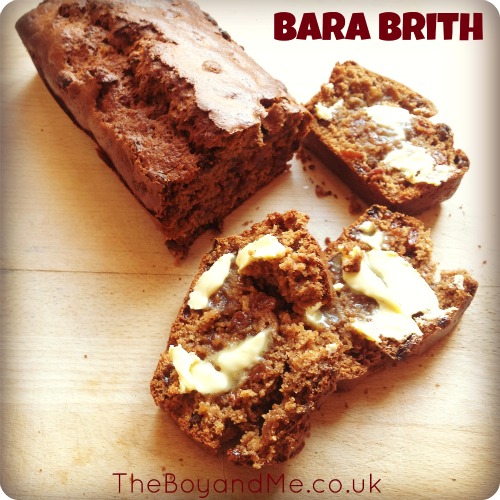
Bara Brith is a popular spiced tea loaf in Wales and means 'speckled bread'. The speckled part comes from the raisins which are scattered throughout the bread, which would have been made traditionally from leftover bread dough. To make the dough more of a sweet than a savoury, mixed spice is added, and the raisins are soaked in tea to plump them up and make the bread moist. Modern day Bara Brith recipes don't use yeast, making the loaf a lot quicker to make.

The first thing to do when making Bara Brith is to put the kettle on and make a strong cup of tea, but not for yourself!

Ingredients:

  • 225g mixed dried fruit
  • 225ml hot strong tea, strained
  • 225g self-raising flour
  • 1tbsp mixed spice
  • 25g butter
  • 100g brown sugar
  • 1 egg

1. Soak the fruit in the hot strong tea for at least an hour to plump up the raisins (this process can be sped up by microwaving it for 2 minutes). I added the mixed spice at this point to infuse it into the tea, traditionally it is added in with the flour.

tea loaf

2. Preheat the oven to 180degreesC/350degreesC/gas mark 4. Grease and line a loaf tin, or use a silicon baking 'tin' instead, far easier.
3. Sift the flour (and the mixed spice) into a large mixing bowl. Add the butter and mix into a breadcrumb consistency.
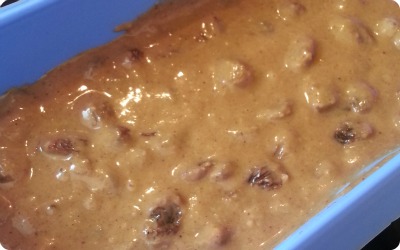
4. Stir in the sugar, then add the fruit and its liquid along with the beaten egg. Stir well to make a mixture with a soft consistency.

tea loaf

5. Transfer to the baking tin and put into the preheated oven for about an hour or until an inserted skewer comes out clean.
6. Turn onto a wire rack and leave to cool completely.
7. Serve the Bara Brith sliced and buttered.

fruit tea loaf

How To Make A Play Kitchen

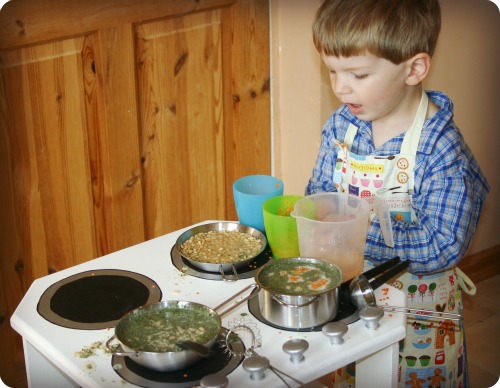
I've always wanted a wooden play kitchen for The Boy, but they're incredibly pricey and we just don't have the space for one. It's such a shame because I know he'd love one and would spend hours pretending to cook on it, just as we do in real life. But I can't magic more space or money so unfortunately, I had resigned myself to no cooker for him.

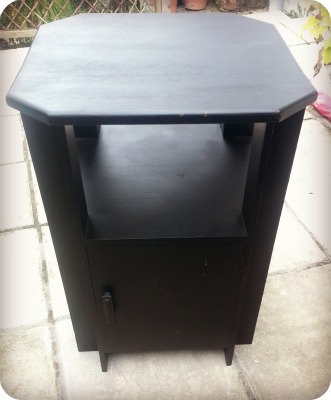
And then I saw a tweet from @Scrapbookerry showing a Pinterest idea she'd seen to use a side table and turn it into a play kitchen. The idea originally came from a site called Ikea Hackers. So I repinned the idea on Pinterest, and in my brain, and we set off for the car boot sale to sell our unwanted treasures. After we'd packed up, we wondered around and with my beady eyes, I managed to spot this little gem, which I bargained the guy down to £3 for!

How to make a play kitchen

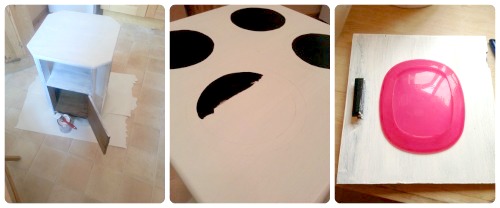
As there was no time like the present, we nipped over to the nearest DIY store and bought some white paint, a row of hooks and some knobs.

The next step was to sand it all over to remove the top layer of the black paint and smooth any sharp edges. Then to start on the many coats of white paint (four in total) I needed to cover the black.

how to make a play kitchen

Next I measured out and drew four circles on the top of the cupboard to make four cooker rings. These were painted black with a silver ring around the outside of them.

The door was removed, a plastic plate used to draw around and my husband cut out that shape from the door. I sanded the edges, painted both sides of the door, and then used masking tape to edge a piece of perspex we had lying around, and superglued it onto the inside of the door.

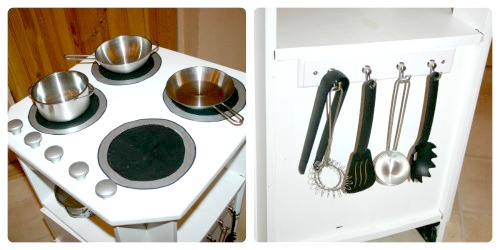
Finally my husband drilled five holes along the front to attach the knobs that I had painted silver, and screwed the hook unit onto the side of the cupboard.

Cost:

  • table – £3
  • paint – £8
  • knobs – £4
  • hooks – £4
    • Total = £19

    DIY play kitchen

I bought the saucepans & utensils for £14.

Me and My Shadow

I Love Cake: Fun

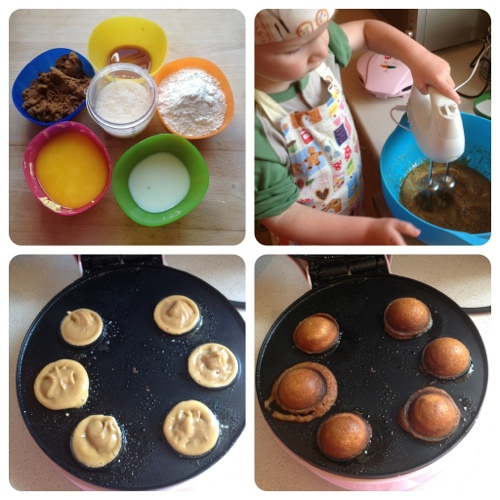
I first saw the concept of 'cake pops' on The Crazy Kitchen well over a year ago now and, while I was incredibly impressed with the inventiveness and finished result, I am just too messy a cook when it comes to presentation to even contemplate making them like that. Hats off to Helen, but I hate getting gloopy hands!

Then I saw that one of my other blogging friends had been given a cake pop maker for Christmas and, because I like kitchen gadgets, I instantly wanted one despite there being none in the shops due to it's popularity. Fast forward a few months and the desire reared its head again, yet again there were none. But yesterday I managed to pop into Lakeland and buy myself one for the sum of £19.99.

The recipe given in the booklet that comes with the maker is incredibly simple!

Ingredients:

  • 125g softened butter
  • 125g caster sugar
  • 2 medium eggs
  • 2 tsp vanilla extract
  • 125g self raising flour
  • 2tbsp milk (although I only used 1tbsp)

  1. Beat together the butter and sugar in a bowl until the mixture is light and fluffy.
  2. Beat the eggs in, one at a time, add the vanilla extract and mix to combine.
  3. Sift the flour in and mix, add some milk to make it smoother and beat well.
  4. Put a heaped teaspoon of mix into each well on the cake pop maker, close the lid and cook for four-five minutes until the cakes have risen, are firm and golden brown.

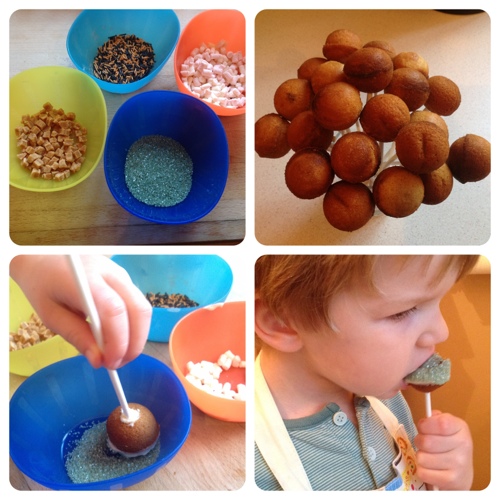
Then to assemble them, I dug a small hold into the underside of the ball and put a small amount of chocolate into the hole before pushing the stick in. This helps hold them in place. We dipped them in melted candy melts and then into a variety of sprinkles, marshmallows and fudge pieces.

This is where I wished I'd used chocolate rather than candy melts: they're too thick to dip and coat. I'd also not dip into the sprinkles, I'd pour them on.

However, they tasted very yummy and have gone down really well with The Boy and his friends this afternoon.

PicMonkeyCollage1A

Toffee Apple Tart

When Mummy Mishaps announced that last month's theme on I Love Cake was toffee or caramel, I had a couple of ideas for my cake but the little minx got in there first! And then yet again, I missed the deadline! However, I thought I'd blog this regardless. I remembered her rather scummy toffee apple cupcakes that she'd made a few months previously and adapted the recipe to make a kind of Bakewell Tart.

Ingredients:

  • Condensed milk toffee (you'll need 100g of brown sugar, 100g of butter and a tin of condensed milk)
  • one cooking apple

Shortcrust pastry:

  • 125g/4oz plain flour
  • pinch of salt
  • 55g/2oz butter, cubed
  • 30-45ml/2-3 tbsp cold water
  • 2oz ground almonds
  • 1oz caster sugar

Frangipane filling:

  • 125g butter
  • 125g caster sugar
  • 2 eggs
  • 125g ground almonds
  • 1tbsp plain flour

bakewell tart

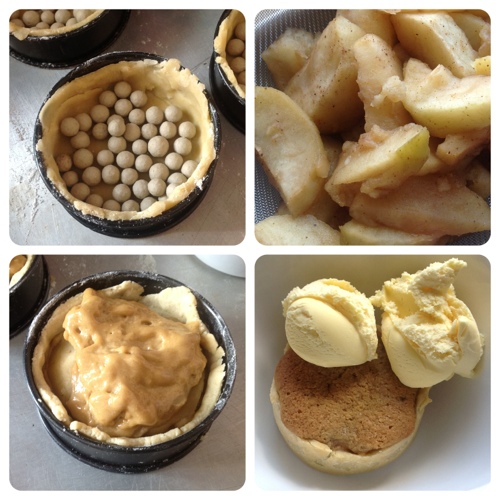
  1. The first stage is to make some toffee. Put the brown sugar and butter into a saucepan and melt. Add the tin of condensed milk and stir while it thickens for 20 minutes. Leave to cool slightly while making everything else.
  2. Make the shortcrust pastry in the traditional way. I added ground almonds and some caster sugar to in order to sweeten it. Put a layer of baking beans over the base and cook for 10 minutes at 180°C.
  3. While this is blind-baking in the oven, poach the cooking apples in 1 tablespoon of water, 1 teaspoon of cinnamon and 1 teaspoon of sugar for ten minutes until softened, then drain.
  4. Cream the sugar and butter for the frangipane mix, add the eggs, sift in the flour and ground almonds. Mix thoroughly.
  5. Put a spoonful of frangipane mix in the base of each tart case, then layer apples on top. Put a dollop of toffee on top of the apples and then another dollop of frangipane over the top again.
  6. Bake for 15-20 minutes at 180°C until a skewer/knife comes out clean.
  7. Serve warm with ice-cream or clotted cream.

Little Dish Meals (Review)

I have spoken before about how important it was to me when weaning The Boy to ensure that he had the best quality food, home-made as much as possible. When I returned to work after my year's maternity leave, I still cooked in bulk for him but I soon discovered the wonders of Little Dish meals and was happy to supplement his diet with them.

Why do I like Little Dish?

  • 100% natural ingredients
  • no added salt or sugar
  • no additives or preservatives
  • taste tested by a panel of real-life little people who are selected to approve new recipes
  • suitable for home freezing
  • damned tasty!

Little Dish has sent a few meals for The Boy to test, and me their cookbook with over sixty recipes in it.

Chicken Risotto

This tasty meal contains bite size British chicken breast, tomatoes, butternut squash, sweet potato and cheddar cheese. Risotto is one of his favaourite meals, and this particular dish went down a treat. Like many infants, he doesn't like the texture of proper meat and finds it difficult to chew. The chicken in this meal is tenderly cooked and small enough that he manages it with no problem.

With the sun shining, he wolfed it down enjoying the balmy weather on the patio! It's a large portion and he ate three-quarters, which bearing in mind his main meal is at lunchtime, was a lot. He sat there, looking around the garden, took a big mouthful, smiled and declared (after he'd swallowed), "It's lovely, mummy!"

Beef Lasagne

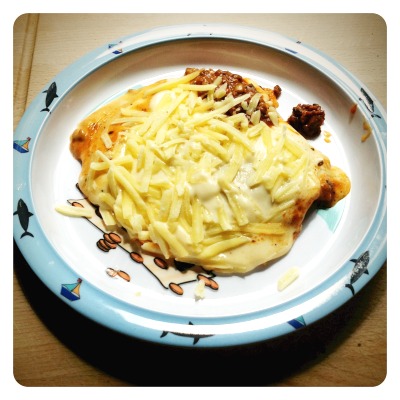
Beef. He's not a fan of it and I can't cook a single thing with it that he will eat, and I didn't hold up much hope for the beef lasagne that I placed in front of him with extra cheese on top (because that always works).

He absolutely wolfed it down! The bechamel sauce was thick and creamy, the tomato ragu wasn't strong and complimented the beef well (or so my non-vegetarian husband informs me!). The above portion is half of what's in the packet so you can see that there's a fair amount.

Chicken and Butternut Squash Pie

The Chicken and Butternut Squash pie is one of The Boy's favourite Little Dish meals as it is an incredibly tasty meal. The chicken has been diced into small chunks and is easily chewed, the butternut squash is a sweet addition and the mashed potato topping is creamy and smooth. I served it with wedges and peas, knowing that he was going to be getting several of his five-a-day in the meal.

Little Dish meals are great quality and are always guaranteed to go down well with The Boy. It is reassuring to know that the ingredients are quality and natural, and the price is very reasonable especially if you split them and serve them with vegetables as we do.

I was sent three Little Dish meals for the purpose of this review. My opinion is honest and unbiased.

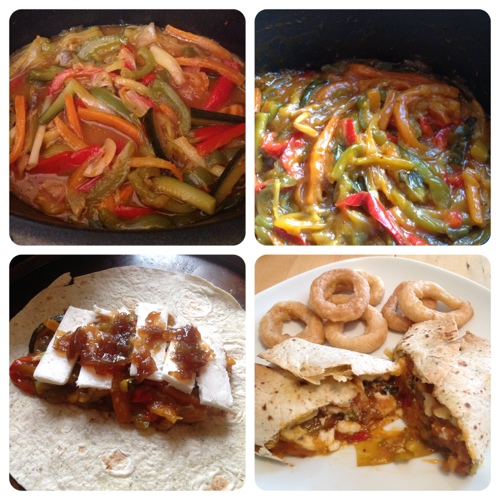
Slow-Cooker Sunday: Rainbow Vegetables & Goat's Cheese Wrap

While the marvellous Mediocre Mum is off in the pursuit of lasting sunshine on the other side of the pond, Aly from Plus2Point4 and I will be taking care of her popular linky so she can enjoy the Canadian weather while we dodge the rain showers.

Recently Mediocre Mum put out an appeal for Summer recipes, and it's with that in mind that I'm using this recipe which was inspired by something that The Crazy Kitchen posted.

Rainbow Vegetables & Goat's Cheese Wrap

slow cooker vegetables

Ingredients:

  • peppers, carrots, leeks, mushrooms, courgettes
  • mango chutney
  • stock cube
  • soft tortilla wraps
  • hard goat's cheese
  • caramelised onion chutney (optional)
  1. I sweated down chopped mushrooms and stipped leeks in a knob of butter in the slow-cooker first, before adding pepper, courgette and carrot strips. To this I put two tablespoons of water, a stock cube and my old faithful of two tablespoons of mango chutney. Stir and cook on high for two-three hours.
  2. Drain off the liquid and put a good spoonful onto the middle of each wrap in a rectangular shape.
  3. Place a layer of goat's cheese on top, then a smearing of caramelised onion chutney on the top again.
  4. Fold up the wrap, use cocktail sticks to hold it in place and place in the over for ten minutes to crisp it up, maintain its shape and allow the cheese to melt in.
  5. Serve with ranch salad and onion rings.

Please join in below with your slow-cooker recipes: either savoury and sweet.

TheBoyandMe's Slow-Cooker Sunday

Related Posts Plugin for WordPress, Blogger...