The Gallery: My Kitchen

The theme for this week's The Gallery requires visiting an area of the house that's going to get a lot of use over the next month, more than normal and culminating in either catastrophic chaos or a calm culinary corner away from glitz and sparkle:

This week's theme is: The Kitchen.

It can be food, or your corner of the kitchen, or something you particularly love in there, your apron, your favourite recipe book.

Growing up, we had a tiny kitchen. Little more than a galley, there was just about room for two people to stand either end as long as they didn't want to pass. For a household of six people, it was far from ideal, but as it was located in the first floor extension of a four-storey house which had been converted into maisonettes, there was little room for expansion.

When we bought this house I sighed wearily when I saw the size of the kitchen. We live in a 1950s ex-council, three-bedroom, semi-detached house and the kitchen, again, was woefully inadequate in comparison to the remainder of the house. However, we were lucky because we needed to do a fair amount of structural work to the property and so were able to create more space by knowing the hall cupboard and pantry out and joining them onto the kitchen.

I love the room now. It's big enough for several people to stand around in and chatter while I cook, there's plenty of workspace and cupboards, and on a day like today the sun streams through the south-facing window and sets the walls alight with am amber glow.

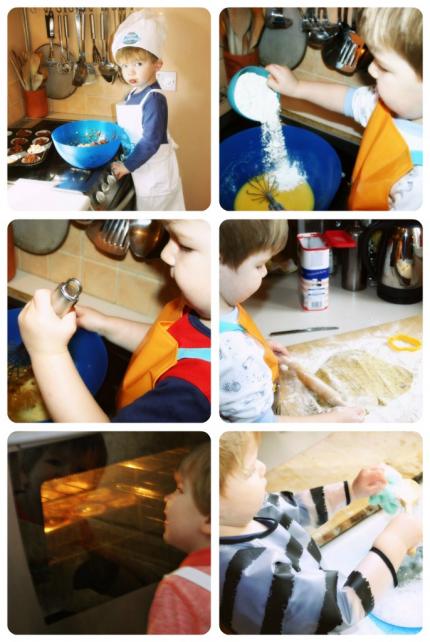
My kitchen is the place where this happens:
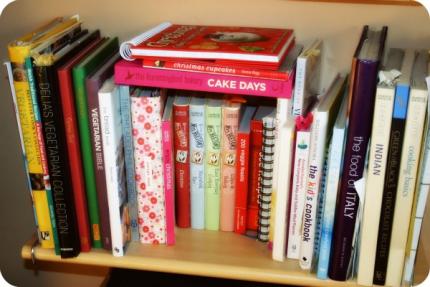
It's a place to show off these:
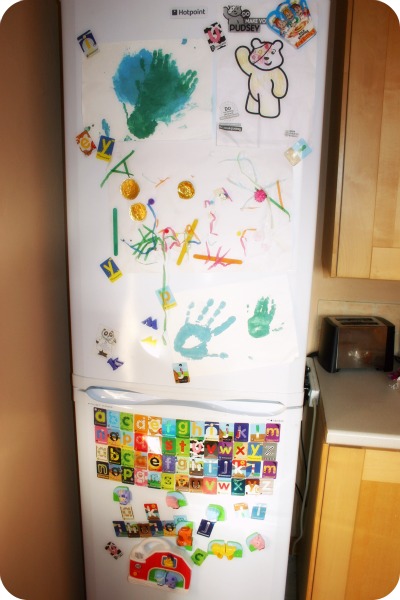
And, despite me always maintaining that I hated things on the fridge, it is now The Gallery in this house:
Pop over and see the other link-ups in The Gallery by pressing this widgetty doo-dah thingy below:

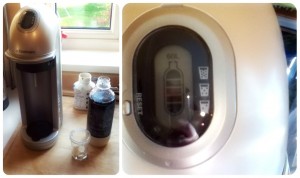
Get Busy With The Fizzy!

When I was a nipper, some of my friends had a trendy gadget which I hankered after. It worked like magic, almost Biblical in its ability to transform water into, well ok not wine but, orangeade, cherryade and cola! I was desperate for one, but it was never going to happen: we didn't have fizzy drinks in our house, let alone the money to buy something to make them.

Fast forward twenty years and I was a home-owner with a monthly wage of my own. We bought a fizzy drink maker and our soda-stream was an adored item for quite a few years. That is until we moved back to south Wales and it got broken in the move. Fast forward another seven years and I have one in my possession again, and this time no-one is touching my precious SodaStream!

We've found the SodaStream to be incredibly useful, not only did it help create some marvellous mocktails for Hallowe'en, but it is also incredibly economic. Using tap water, plus a capful of syrup to make a bottle of cola (to accompany my Tia Maria) or some lemonade for mum is cheaper, quicker and convenient. We often open a shop-bought bottle, only for it to go flat halfway through before it's finished. £1.50 wasted.

Then of course, there's the environmental impact. Reusable bottle which is fairly long-lasting? Gas cannister which gets sent back and is refilled? Ecologically sensible choice.

We were also sent a range of flavours, which was interesting because the range of flavours are no longer contained to the sugary syrups any more. There are a whole load of SodaStream flavours which are free from artifical flavours, colours and sweeteners: Mango & Apple, Kiwi & Pear and Passion & Mango and Cranberry & Raspberry. Scrummy!

One of the changes from the my previous SodaStream is the addition of the display. The SodaStream Fizz which we were sent has a digital display for an accurate and timely amount of bubbles, which enables you to have the strength of fizz that you want. The Fizz Chip will also display the amount of CO2 remaining in your cylinder.

SodaStream has never been so attractive, easy to use and damn cool!

I was sent a SodaStream Fizz and a range of flavours for the purpose of this review. My opinion is honest and unbiased.

Review: Digital Scales Measuring Jug

I've been doing a fair amount of cooking with The Boy over the past few months, and my trusty digital scales have never failed me. My measuring jug on the other hand is a joke because all the markings have rubbed off it. I have a metal one, but it only has millilitres marked in 100s and pints on it, so for more precise measurements or fluid ounces it's a pain!

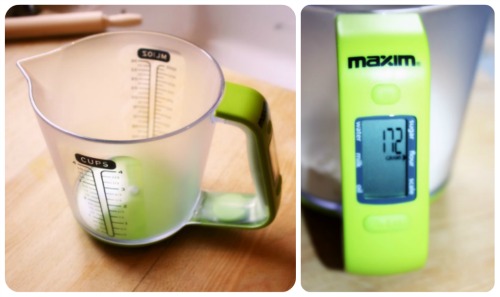
Killing two birds with one attractive and trendy green stone is this Digital Scales Measuring Jug by Maxim.

On one side of the jug is a scale in cups, the other side has millilitres and fluid ounces. However, in addition to this, the base has a digital scale built into it which can measure in grams and ounces.

But here's the nifty bit, you can select your ingredient from one of five presets to calculate its weight or volume. For example, the scale on the side in millilitres shows markers in 50ml. However if you needed 320ml of water you could be left guessing. By using this scale, if you press the button to get to the water marker it can measure it accurately. Likewise for milk and oil (based on their differing densitities: oil = 0.9kg/l, milk = 1.03kg/l, water = 1kg/l). It can also calculate the weight of flour and sugar using the same technique but showing the weight (in either grams or ounces) not the volume.

Another great thing about this is that the 'tare' setting (reset) button can be used with additional ingredients. Weighing out your mixed dry ingredients can be super-easy: measure the flour, press the reset button and measure the sugar, press reset and measure the spices, etc.

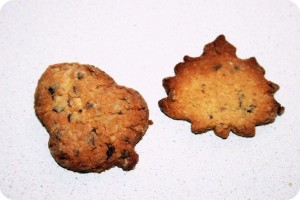
I used this earlier with The Boy when making our Gruffalo cookies and it was incredibly easy. I will confess to double-checking the first two ingredients' measuements against my normal scales and they showed exactly the same reading.

This digital measuring jug is going to make life a lot easier over Christmas!

I was sent this for the purpose of this review. My opinion is unbiased and honest.

Cooking with The Gruffalo

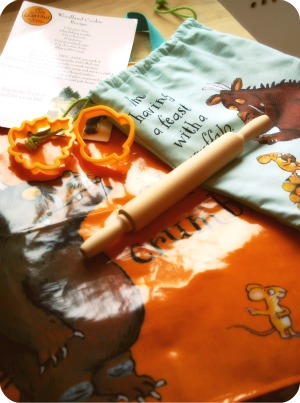
I realised this morning that it's been nearly a month since The Boy and Me (ha!) have done any baking together, and so I cracked open the plain flour and the weighing scales. We'd had a Gruffalo apron set sent to us from Dunelm so I decided to follow the recipe on the recipe card given in the pack to make Woodland Cookies.

Woodland Cookies

Ingredients:

  • 170g plain flour
  • 1tbsp baking powder
  • 57g rolled oats
  • 113g butter
  • 113g caster sugar
  • 57g chocolate drops
  • 2tbsp golden syrup

1. Preheat the oven to 180°C.

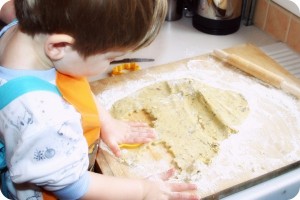
2. Put on your unbelievably cute, wipe-clean Gruffalo apron and smile at mummy, while not falling off the chair.

3. Mix the flour, baking powder and rolled oats together.

4. Rub in the butter to make a crumble mixture.

5. Add the sugar, chocolate drops and golden syrup and mix to a stiff dough.

6. Roll out the mixture onto a floured surface, using the cute little rolling pin included in the set.

7. Use the cutters to cut out some cookies and place on greased and floured baking tray.

8. Cook for 20 minutes or until pale brown.

I was sent the Gruffalo cooking set in order to review. My opinion that it's excellent value for money is honest and unbiased.

The Crazy Kitchen

Recipe Shed: Butternut Squash (& Blue Cheese) Risotto

When I saw that this week's Recipe Shed theme was 'vegetarian', I knew it would be rude of me not to take part. This recipe is one of our favourite meals, we don't normally have it with blue cheese but I have some in the fridge which is in danger of being more blue than cheese, so I'm bunging that in too!

Depending upon which degree of vegetarianism you subscribe to, this may need altering to suit your requirements. For example, I have a Bachelors in Vegetarianism: I don't eat meat or fish, but don't sift through the cheeses to find rennet-free types in the supermarket. Life's too short to stuff a mushroom, ya'know. If you have a Masters in Vegetarianism, then you may want to substitute the single cream for something like Alpro Soya, likewise the cheese. If you have an HND in being a Veggie, then you need to realise that eating fish makes the rest of us have to say "no, I don't eat fish because I'm a vegetarian!" so thanks for that!

Ingredients

  • handful of mushrooms
  • one leek
  • 2 handfuls of arborio rice per person
  • half a butternut squash
  • a stock cube
  • 2 (ish) pints of hot water
  • 100ml of Single cream
  • blue cheese
  • Parmesan
  • unsalted butter

1. Cut the butternut squash up into small chunks and cook for ten minutes in 2 pints of hot water and a stock cube.

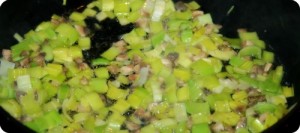
2. While that's bubbling away, thinly slice the mushrooms and leeks. As The Boy is sharing this with us, I cut the leeks up very small. As neither of us like the texture of mushrooms then these also go very small. Sweat them down in a generous knob of butter.

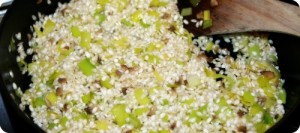
3. After five minutes, add the rice to the pan of butter, mushrooms and leeks. I can't remember why, I think it's something to do with coating and sealing each grain of rice with the butter, but I could be making that up! Leave it for a minute or two, stirring halfway through.

4. Transfer two ladles of stock (not the butternut squash though) into the pan with the rice and stir through. This initial water will disappear quickly so give it a stir and add some more.

5. This is the bit which requires constant attention and judgement. The risotto will need stirring every minute or two to stop it sticking, and the second the water has been absorbed into the rice, you need to add another ladle of stock. This is why I am typing this up on the iPod Touch while I'm busy watching the rice (in fact, I was so busy explaining then I forgot to stir and my rice stuck in one section!). This will take about twenty minutes on a low heat. You might need all the stock, you might not. Transfer the butternut squash across at the end.

6. When the risotto has plumped up and absorbed most of the liquid (apart from a small amount around the sides), taste it to check. It should have a small bite to it and not be slushy. However, chewy risotto isn't right so possibly add a bit more water and cook it for a few minutes longer.

7. Add the single cream and the cheese and stir through. Keep on the heat for a further minute to make sure the heat has melted the cheese.

8. Serve with a sprinkling of Parmesan on top.

Pop over to Reluctant Housedad's Recipe Shed to check out the other veggie delights by pressing this linky doo-dah malarky!


Recipe Shed

Apple Preserves

Several months ago, my mum put a condiment on the dinner table which was gorgeous. It was an apple and mint jelly. Was it for pork, was it for lamb? Did it matter? I'm vegetarian so whatever it was originally meant for was never going to be something that I would consume. Nonetheless it was delicious with salads and baby boiled new potatoes smothered in butter and black pepper.

I've tried to find it, to no avail. Then when the 'chutney chums' (i.e. The Crazy Kitchen, me and Mummy Mishaps) started talking about all things preserving a few weeks ago, I thought I'd give it a go.

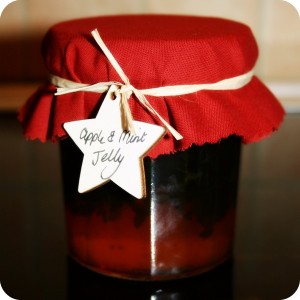
Apple and Mint Jelly

Makes: 2 jam jars

Ingredients:

  • 1kg apples, peeled and cored
  • 1 litre water
  • 30g fresh mint, chopped
  • 500g caster sugar
  1. Add the apples and 2 tablespoons of water to a large saucepan, cook for twenty minutes over low to medium heat. Spoon the mixture into a large sieve with a sterilised muslin (I used one of The Boy's unused muslins sterilised with a steaming hot iron) and let the juice drain into a bowl. (Try to leave for 3 hours, I didn't have that amount of time so I left it for 2 hours).
  2. Add the mint and 1 litre of water to a saucepan and bring to the boil. Remove from heat and set aside for 10 minutes.
  3. Pour in the strained apple juice and add sugar. Bring to the boil, reduce heat and and simmer gently for 1 hour+, stirring constantly. (The original recipe said 40 minutes, I ended up simmering it away for an hour and a half before it reached setting point).
  4. Pour into sterilized jars, cover with damp cellophane covers (which will tighten as they dry, creating an air-tight seal) and leave to cool. Store in a dark, cool cupboard. They should have a best before of a year from sealing.

My recipe has been adapted from one on AllRecipes.co.uk. I also found this site most helpful when I was trying to work out if it had reached setting point.

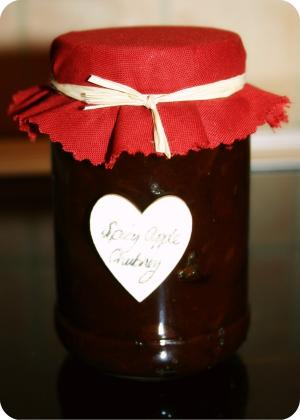
The big question of what to do with all that left over apple arose. So I made some Spiced Apple Chutney!

Ingredients:

Makes 2 jam jars

  • 225g onions (chopped)
  • 900g apples (cored & chopped)
  • 110g sultanas or raisins
  • 15g ground coriander
  • 15g paprika
  • 15g salt
  • 15g each of cinnamon, nutmeg, ginger
  • 340 granulated sugar
  • 425ml white wine vinegar
  1. Put all the ingredients into a heavy pan.
  2. Slowly bring to the boil until all the sugar has dissolved.
  3. Simmer for 1½-2 hours, stirring from time-time to stop the chutney from sticking.
  4. Take the lid off to reduce down for further thirty minutes or so.
  5. When it is very thick and a spoon drawn across it leaves a channel which doesn't immediately fill with liquid, the chutney is ready to transfer to the jars.
  6. While still hot, turn into sterilised jars, use wax discs and damp cellophane to seal. Allow to cool.
  7. Store in a cool, dark cupboard for two-three months before eating. Can be kept for up to twelve months sealed.


I adapted this recipe from one on the BBC Good Food Guide.

Tips:

  • Sterilise jars and utensils in the dishwasher.
  • Use wax discs and cellophane film lids as lids from jars can corrode effecting the chutney. Also it has to be put in piping hot for the dimple on the lid to suction down or it's not sterile.
  • Sterilise the muslin with a hot iron.
  • When fastening the fabric cover, hold it in place with an elastic band first. If you are one of those genetically-modified humans who have four hands, and can therefore hold the fabric in place and wrap the raffia around, don't bother, you'll be fine. Once the raffia is wrapped around, remove the elastic band.

ShowOff ShowCase: The Scary & Spooky One

You know the usual format for ShowOff ShowCase by now; link up a post either along a theme, or The One That Should Have Done Better.

This weekend, it's the turn of a theme. So in recognition of all the ghoulish and ghastly posts out there highlighting craft activities or cookery or party games, I've decided that the theme is:

The Scary & Spooky One

Link up as many Hallowe'en posts as you want, let's use it as a resource bank of activities!

ShowOff ShowCase

Hungry Hallowe'en

This year, probably due to The Boy being that much older, I'm really feeling Hallowe'en. Not the ghosts and ghoulies (steady on) you understand, but the whole party, dressing up malarky. It's helped by the planning that I'm doing for my toddler group's party this weekend, and so I've been going to town on costumes, decorations and food. As it's obviously a party for under-five year olds, the food we're preparing has to be quick and easy to cook, transfer and eat. However, there are some other meals that will be featuring on the menu at home this weekend.

Scary Soup

  1. Heat 1tbsp of olive oil in a large pan, add one chopped leek and a handful of sliced mushrooms. Sweat for a few minutes to soften.
  2. Add the chopped flesh of one butternut squash (or pumpkin), two diced carrots and two peeled and diced sweet potatoes and cook for a couple of minutes. Then add 1½ pints of stock. Season with salt and ground black pepper, cover and bring to the boil, then simmer for 25 mins until the squash, carrot and sweet potato are really tender.
  3. Stir 200ml of Alpro soya milk* into the soup, whiz everything together in blender or processor in batches until smooth. Return to the pan, gently warm through to serve. Pour into bowls and finish with a swirl of Alpro soya alternative to cream*.
  4. Serve with crusty, warmed baguette or tiger bread.

Alpro Soya is a tasty alternative to dairy for those who are lactose intolerant.

 Devil's Cakes

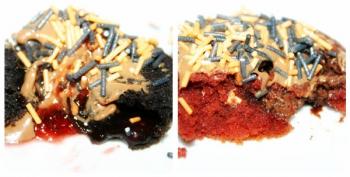
Who doesn't love a little bit of Gothic coloured sponge cake? Black oozing red, sticky substance anyone? The full recipe for these, can be found here.

Mudpots

I've always wanted to have a go at making my own jelly-type pudding but obviously being vegetarian, it's a bit tricky! I recently discovered a vegetarian gelatine and had a go at using the powder. I mixed one sachet with 1 pint of Alpro Soya 'milk'* and stirred it until it had dissolved. Bringing it to just under the boil, I stirred in one pot of Alpro Soya chocolate dessert* and mixed it through with a balloon whisk. To flavour even further, I added 40g of chocolate orange drinking chocolate (if this is intended as a dairy-free pudding, check the drinking chocolate is lactose-free) and whisked this in thoroughly. Pour the mixture into serving dishes and allow to cool. After half an hour, the pudding should be thick enough to allow a segment of satsuma (hoorah, Christmas is coming) to rest on the top, sprinkle with chocolate flakes.

Scrummy!

Ghoulish Guzzlers

Vampire Broth: 3 parts diet cola* made using our new Sodastream* and 1 part vanilla ice-cream. Dust the rim of the glass with caster sugar, place the ice-cream inside and pour on the cola. Watch it froth up!

Magic Potion: 2 parts sparkling apple juice* and 2 parts cranberry and raspberry juice* (both sugar-free). Decorate the rim with red edible glitter for that extra touch of blood-curdling authenticity. If you've got any raspberries (we don't) crush them up and add them to the mix.

Chilling Chocolate: Dust the edge of a glass with cocoa powder (not drinking chocolate as it often contains dairy) and pour in some cool Alpro Soya chocolate milk*.

Can you come up with any more funky mocktails?

 I was sent the items marked with a * to review. However, all the cooking, images and text are my own, and honest.

ShowOff Showcase

Recipe Shed: Chutneys and Preserves

There's a lingering aroma in this house, and it's permeating through the cables tethering us to the outer world, finding it's way through the timeline of many a twit and combining with other bloggers' fragrances.

No, it's not the latest parfum. It's a far more consuming smell than that.

Vinegar.

Of course, there are the variants: red wine, white wine, balsamic, malt and pickling, but they all have the one purpose. To preserve our chosen fruit or vegetable, creating a mouth-watering chutney that needs to be given time to mature and reach its full-bodied flavour.

I've been like a woman possessed recently. Never having made a chutney before, I've been having a go at a few different types, experimenting with and altering recipes that I've found. Noting changes down in my recipe folder, splashing it with spices and caramelised onions for that added authenticity.

But I'm not the only one. My timeline (and inbox) is full of others who've been taken with the preserving passion, and so I said to Reluctant Housedad last week that he ought to do it as a theme one week for his successful Recipe Shed linky. After the tumbleweed had finally settled, he kindly told me that it wasn't 'his bag' (because we are in the '70s) and offered for me to host the Recipe Shed this week while he visits family for half-term. I jumped at the chance!

So here you have it, for one week only:

TheBoyandMe hosts the Recipe Shed!

Caramelised Red Onion Chutney

Ingredients

  • 8 red onions
  • 1 red chilli
  • 25ml olive oil
  • 200g brown sugar
  • 150ml balsamic vinegar
  • 150ml red wine vinegar

1. Cut the onion and chilli into short thin slivers and put into a heavy pan with the oil. Cook gently over a low heat for 30 minutes, stirring occasionally.

2. Once the onions are dark and sticky, add the sugar and vinegars. Cook on a high heat until bubbling (usually about 30 minutes), then turn the gas down to simmering for a further hour. It will be ready when drawing a wooden spoon through the mixtures leaves a channel behind that doesn't immediately fill with liquid or juices.

3. Immediately, spoon the chutney into sterilised jars, filling almost to the top of the jar.

4. While still piping hot, press a wax disc down on the mixture (wax side down) ensuring that it has been pushed against it fully with no air bubbles. Wet a cellophane circle (especially for preserving) on one side and place over the hot jar, damp side up. Pull it tight and use a tight elastic band around the neck. As the mixture cools, the damp cellophane will be pulled even more taut making it airtight and preventing the nasty bacteria from multiplying. Store for 2-3 months to allow the chutney to mature.

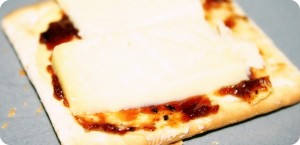
Or if you have some spare that doesn't fit into the bottles, spread it on cream crackers with some mature cheddar and enjoy as a late-night snack.

I've been making quite a few batches of different flavoured chutneys recently, with the intention of giving them for Christmas presents. I've bought some little wooden tags from ebay and am using them to label.

I'd be happy with that, wouldn't you?

Both Reluctant Housedad and I would love it if you would link up to our Chutneys and Preserves linky using the linky tools below. With his permission, I've adapted the code for the badge for this week only so that when it's added to your post, it comes back to this main page.

Next week, he's reclaiming his Recipe Shed where the theme will be Vegetarian in honour of me (I like to think!).

Recipe Shed

More On Monday: Rainbow Pizza

Yesterday I posted this as my Silent Sunday, and I had many people asking what The Boy was making so I thought I'd share with you.

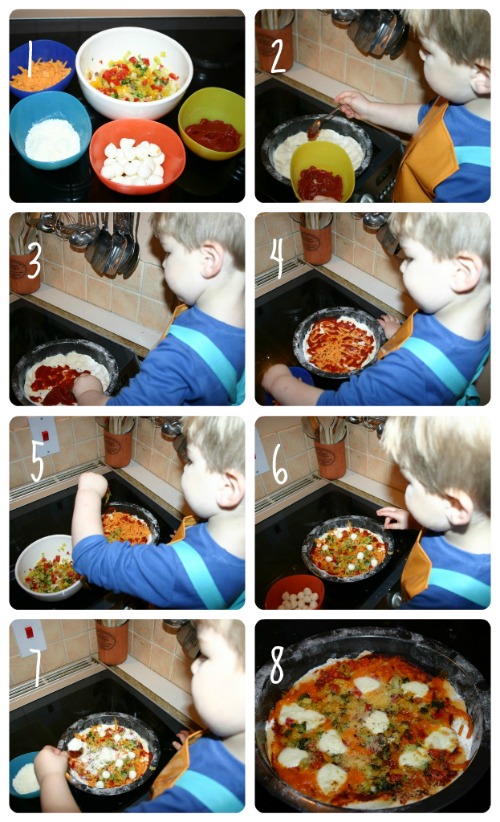
Aware that the cooking experiences that he'd had so far had revolved around cake, I decided we'd make pizza together. A relatively simple main meal to involve your child in, and promoting healthy eating along with encouraging to eat his tea. I won't lie, it wasn't without stress. I am never making pizza dough ever again. Next time, I shall buy a ready-made base from the place where 'every little helps'. Because they're not wrong, it would have helped a lot!

Oh, and the Silent Snday picture was of him sprinkling on parmesan cheese.

He needed a little help with the tomato puree because he hasn't quite got the concept of him spreading with the back of a spoon, what with him being two and all that. However, the rest of it, he did himself with me just pointing at blank spaces to put a topping on. It turned out to be quite a quite a large pizza for him and so he only had a quarter of it, but he wolfed it down.

Just goes to show how tasty home-cooked food can be, doesn't it?

I'm linking this up to The Crazy Kitchen's 'Cooking with your Toddler' linky and the 'Recipe Shed' over on Reluctant Housedad

The Crazy Kitchen

Recipe Shed

Related Posts Plugin for WordPress, Blogger...