Making Bunting With The Cricut Mini

I was recently sent a Cricut Mini Personal Electric Cutter which is a rather exciting new craft toy, especially for me. Finding time for me to do some craft has been quite tricky, especially as I always seem to be coming up with new creations with The Boy, but I decided that Hallowe'en was the perfect time to explore what the Cricut could do.

So what is a Cricut?

A Cricut is a cutting machine, similar to a printer in the way that it transfers an image to paper, but rather than laying ink down on the paper in lines the Cricut cuts the paper where the ink lines would be. The Cricut website states that 'You can cut images and fonts on cardstock, vinyl, vellum, fabric, chipboard, and even thin foil at sizes as small as ¼" and as large as 11 ½".' There is an adhesive, A4 cutting mat which the material is pressed down onto in order to hold it in place making it easier for the rounded blade to cut it.

I decided to have a go at making a strand of Hallowe'en bunting to hang in the porch to show the local children we were prepared for trick or treaters (shame I didn't anticipate how many would call, and had to end up dishing out ten Smarties per child from The Boy's chocolate stash!).

The first step when using the Cricut is to install the software for the 'Craft Room', this then loads up an image of the cutting mat, along with the available 'cartridges' (designs and templates which the Cricut can cut out). There is a basic cartridge available with the machine which includes an alphabet, some basic seasonal shapes, one or two card and gift tag projects; certainly enough to be going on with for the novice Cricut crafter.
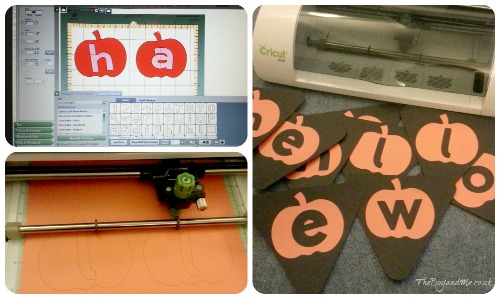
Mini-cricut cutter

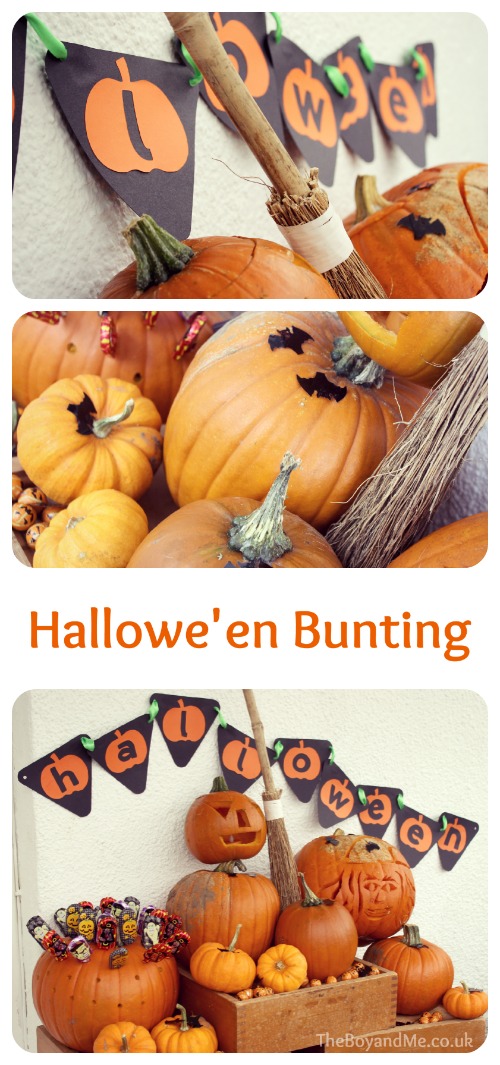
Adding an image to the Craft Room is easily done by clicking on it, then resizing or rotating as needed. I decided to go for a simple pumpkin on orange paper with the letters spelling 'Hallowe'en' in the middle of each one. As these were to be stuck onto black card, the letters were going to be a negative space to provide a contrasting and striking effect. The Cricut cut all the shapes out with minutes and it was simply a case of carefully removing the letters.

The important thing about the Cricut is to adjust the settings for the thickness of the material being used, if it's not set for the right thickness then it won't cut all the way through effectively. Likewise, if the paper is too thin and the thickness is set to maximum then it can tear the edges. Luckily, I spotted that very quickly and a minor adjustment saw a perfect dye-cut through the paper and card.

Finally I glued the pumpkin letters onto the black card, threaded some green ribbon through the holes and hung it in the porch alongside a huge array of pumpkins.
Making Bunting With The Cricut

No wonder all the local children came calling!

I was sent the Cricut Mini Personal Electric Cutter for review, my opinions and ideas are my own and honest.

Days 300 – 306 of Project 365

300-306 of 365

2nd November 2013 (Saturday)

300. Glee (Pure joy as The Boy flings Autumn leaves into the air at the National Trust site of Tyntesfield.)

301. Town Planner (The start of our half-term craft and play project.)

302. It's High Up Here! (Standing aloft a bale of hay at Yeo Valley with Burton and Jenson from Mummy Mishaps.)

303. Landscape Architect (Continuing our craft and play project where The Boy initiated his first ever written word without any prompting; bottom left he wrote a label on the cardboard.)

304. Pumpkin Driller (Little boys who are four aren't old enough to carve a pumpkin, so we drilled holes in it instead.)

305. Five Dec-car (He wanted to make a five decker car. Because he's four and he can.)

306. Hold On (We were in Reading for the Matilda Mae Welly Walk in Beale Park, and went off exploring with Laura from Tired Mummy of Two and her family. This is The Boy and Elizabeth squealing with laughter while Tired Daddy of Two pushed them.)

TheBoyandMe's 365 Linky

Days 230-236 of Project 365

230-236 of 365

230. Plopping (Following on from my brother's goodbye before he emigrates to Australia, I phoned my eldest brother to ask if he'd like to do something. We went to Southerndown beach further long the coast, which is one of my favourite beaches in Wales. The Boy and his Fiery Cousin plunged straight into the enormous rockpool splashing about, followed by a brief picnic and a quick departure from the beach as the tide was rapidly coming in; thank goodness for the RNLI warning klaxon. We then explored the ruined castle on the cliffs before plopping some stones into the tumultuous waves. One sibling may be moving to the other side of the world, but I still have two here to appreciate.)

231. The End Is In Sight (We went to Longleat for a Jungle Dogs event, and although we didn't venture into the safari, we did decided to have a go at the hedge maze. Big mistake. It's supposed to take 45 minutes, but after 55 minutes we were losing the will to live I was beginning to feel tetchy and claustrophobic, when fortunately The Boy found the 'This Way Out' sign. We finally crossed the final bridge to freedom!)

232. Small World (Tuesday was a quiet day after the frantic weekend travelling around the country, involving lots of outdoor play with The Boy's Playmobil pirates and the tuff spot. I love the reflection in this photo.)

233. Full (I decided to finally try out my hand at taking a photograph of the full moon using my tripod and the long – 55-250mm – lens that my husband bought me for my birthday. I'm quite pleased with the clarity of it, what do you think?)

234. Grip (We had a go at decorating a t-shirt for a review and I had to hold the fabric down and stretch it out to make it possible for The Boy to draw on. I like this photo for a few reasons; his pencil grip is cute, and I love the way he's holding my hand, his hand looks so small against mine.)

235. Manual (That photo there of The Boy balancing on a blue pole? I took than on manual settings. Fully manual. Not TV or AV or P. But M. For manual. Me.)

236. Drill (We've been doing a craft activity today which involves The Boy using a hand drill for the first time. I was stretched upwards with my camera pointing down to take an overhead view, and hadn't realised that he was so curious about it coming through the underneath, he'd ducked down. I like his inquisitive nature.)

TheBoyandMe's 365 Linky

How To Make A Stick Raft (#43)

Making a raft is an easy activity to do with children, although their age determines exactly how much input you give. The Boy is four years and two months old and quite good with fiddly and intricate things, but making this raft was more about him helping me, than me helping him. Now he knows how to do it, the situation will reverse.

This activity is completely organic, both in the way that it happened, and the materials we used!

How To Make A Stick Raft

You'll need:

  • 4 sticks of equal length for the frame
  • around 8-10 sticks of the same length as those for the frame to create the bed of the raft
  • long grass reeds/stems
  • 1 large leaf or a frond of leaves for the sail
  • 1 stick for the mast
  1. Lay the four sticks for the frame on top of each other to judge size. Carefully wind a long grass reed around each of the join, overlapping and winding from one corner to the other. This will hold them in place. Complete for each corner.
  2. Once the frame is completed, fix each stick to the frame to make the bed of the raft, winding the grass over in a cross fashion as above. Continue until the base is covered, there will be gaps in between each stick.
  3. Use one stick as the mast and a large leaf as the sail. Make two small holes to push the mast through. We actually tied a large frond of leaves to the mast instead.
  4. Insert into a gap in between two of the sticks, carefully wrap grass around to fix it into place.
  5. The raft is ready for sailing!

How To Make A Stick Raft

  • This activity is great for:
    • fine motor skills and hand-eye co-ordination; winding the grass around the sticks.
    • design skills; How can we join the sticks together?
    • problem-solving; Did the raft float or sink? Why? Did it get caught on anything?
    • communication; questioning and discussion.
    • self-esteem; achievement!
    • having FUN!

It is also one of the activities on the National Trust 50 Things To Do Before You're 11&¾ list: #43: Build A Raft!

Country Kids


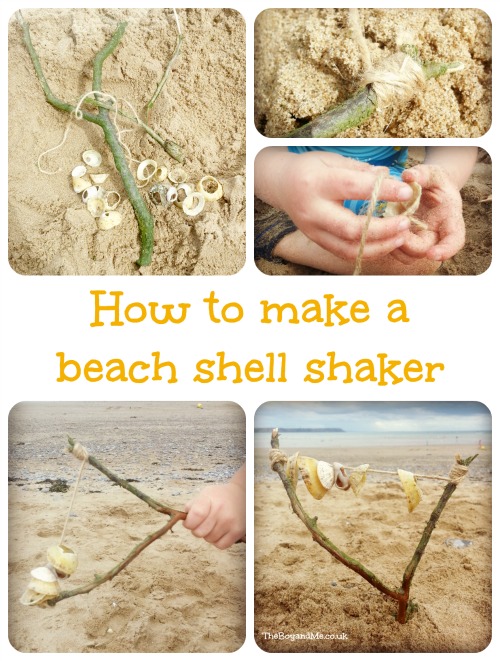
Beach Craft: How To Make A Shell Shaker

We spend a lot of time on the beach at all times of the year, but especially during the warmer months of the year. And just like all children, The Boy likes to collect shells.

Lots of shells.

And it comes to a point when we have to start finding things to do with them.

So this weekend, we collected up shells with holes in them and we made a musical instrument with them!

How To Make A Shell Shaker

You'll need:

  • a 'Y' shaped stick
  • a variety of shells with holes in them (do try and collect different types so that you can discuss the names of them)
  • string
  • something to cut with
  1. Tie one end of the string to one of the 'Y' twigs. Wrap it around several times to make it stronger and also to hide the end of the string. Make a simple knot to fix it into place.
  2. Thread the shells onto the string, alternating the different types and the way that they are facing.
  3. Pull the string taut and wrap it around the other end of the 'Y', making a small knot to hold it in place. Wrap it around several times, tying it off tightly.
  4. Shake, shake, shake!

How To Make A Beach Shell Shaker

Country Kids

Tuesday Tots


Days 132-138 of Project 365

132-138 of 265

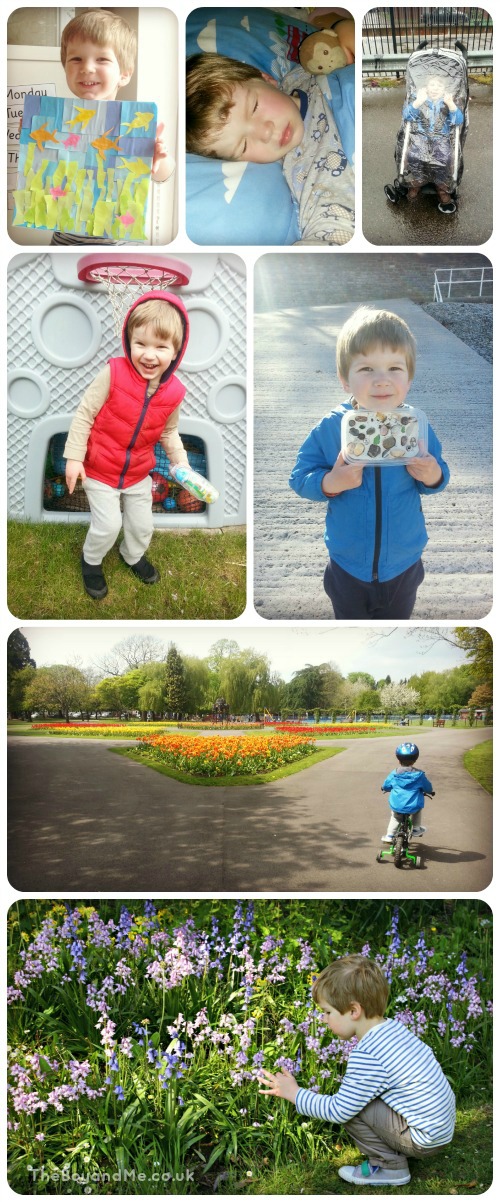
132. Stick it! (After such a beautifully sunny day on Saturday, Sunday saw the doldrums return to the skies over south Wales. The Boy managed a few hours garden play in the morning, then in the afternoon we did some Post-it note art.)

133. End of the day! (A very trying day today. As my car was still poorly with a mahoosive oil leak, I wasn't able to drive to the other side of Cardiff as I wanted to, so we went with my mum. It was a hot and bothersome day, and ultimately boring for The Boy. Mid-afternoon I had a row with the garage who hadn't even started my car, and my dad had to go and help them find the problem. Daddy's girl? Me? Never! The afternoon ended up with a ridiculously elongated dinner time (of well over an hour) and a late bedtime, and a row! Essentially this was all because he was overtired and bored, and it wasn't the best day in my parenting 'career'.)

134. Wet (The garage phoned me at 4.20 to tell me my car was ready and they shut at 5pm. It takes 30 minutes to walk across town to there, it was pouring with rain and The Boy had only just woken up from a nap. Time to test the excellence of the Kiddy raincover. He stayed dry, my Regatta raincoat and jeans were saturated. I made it in time and recovered my car, minus £230 in my bank account.)

135. Sly Fox! (This is a game he's learnt in nursery, a little like Grandma's footsteps or What's The Time, Mr. Wolf.)

136. Sculpture! (I finish work at around 4pm on Thursdays so we've developed a habit of nipping down the beach with my mum for an ice-cream. Today we did a treasure hunt as well for an activity I'm blogging on the 21st May for the '100 Days of Play' activity link-up I'm taking part in.)

137. Rebel! (Just out of shot is a sign saying 'No cycling'. Well I'm sorry but he's 3 and not about to mow someone down so I ignored it. We love this park in Cardiff and took my mum with us, who hasn't been in years, possibly decades. A few drops of rain fell and the park emptied, which I found very sad. We're hardcore and stayed on to see the black clouds off.)

138. Ding Dong ("Mummy, why don't bluebells ding?" The Boy's paternal grandparents came down for a visit today to take us out for lunch, so we took them to Dyffryn Gardens to walk off the pizza and garlic bread after. They were as enchanted as we are with it, and The Boy got to examine some bluebells up close.)

TheBoyandMe's 365 Linky
akiltandacamera.com

Creating The Perfect Craft Room (Guest Post)

With the revival in recent years of crafting as a hobby, having a dedicated space within the home where both adults and children can enjoy pursuing various crafts is a great idea. This will ensure that other areas of the home are free from the all the paraphernalia involved in different crafts and become something of a bolthole for those who are enthusiastic about their hobby.

Which room?

Not everyone is lucky enough to have a room to set aside for a hobby but there are ways of creating this extra space if needed. A summerhouse in the garden that is properly insulated can be used for crafting all year round, or a box room can easily be converted into a studio. If the room is to be used for more than one person then a spare bedroom is the obvious choice for a crafter’s room.

Once the room has been chosen it is necessary to think about some of the essential facilities that it is going to need. If the craft makes use of electrical equipment, such as sewing machines, are there adequate power points? Is there enough natural light getting into the room? All of these points are important and if the space available does not meet the criteria then it is a good idea to think about alternatives. Can the room be rearranged so that the power sockets are more conveniently placed? Can lamps that simulate daylight be used in addition to the existing natural light?

Furnishing a craft room

One of the main points for a craft room is adequate storage. Adequate cupboard space is essential and a drawer unit is a good idea, particularly if the room is being used for more than one craft. Everything can be organised and kept separately until needed. It also ensures that at the end of the day everything can be tidied away properly and found easily again the next day.

A large workspace is also going to be needed, particularly if more than one person is using the room. Dining tables are a good choice for a workspace as they can seat several people and offer plenty of space to work on, no matter what the craft choice.  They also tend to be fairly easy to clean but can be protected with waterproof cloth if needed.

Craft essentials

There are many different options depending upon the type of craft that is chosen. Children’s crafts will inevitably include items such as paints and various different types of paper, but added to this can be crafting scissors (child-friendly of course!), decorative paper punches, paper glue and stamps. For children, opt for the long rolls of plain paper as they last for a long time and are not expensive to buy.

Other craft essentials might include lamps to help out when natural daylight is not enough, a sewing machine, fabrics and yarns. Ensure that everything that might be needed is to hand as there is nothing worse than getting halfway through a project and discovering that it cannot be finished!

image 2

Days 76-82 of Project 365

76-82 of project 365

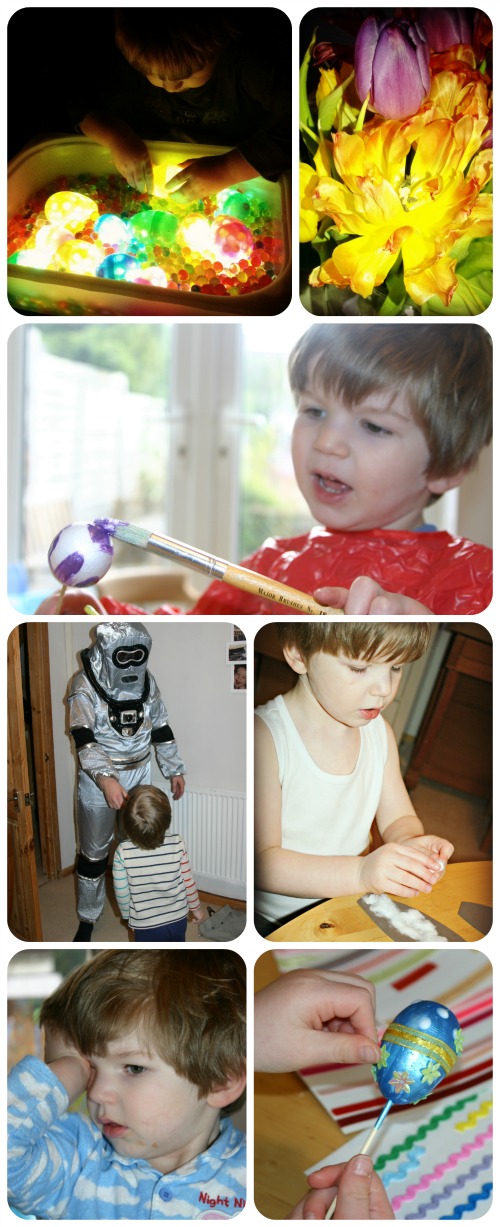
76. Sensory (Having spent the day in bed, completely drained and aching from a flu bug, I managed to drag myself downstairs and set up a light play box for The Boy. I used waterbeads and small submersible lights in plastic Easter eggs and The Boy had great fun playing with them.)

77. Eggy Sticks (We started decorating the polystyrene eggs I'd bought him for Easter. I put them onto kebab skewers as it makes them easier to paint without getting paint everywhere! It's taken all week to finish them off as we both fell ill with the flu bug and recovery has been very slow.)

78. Decay (I couldn't quite bring myself to throw out my dying tulips as the colours and shapes were gorgeous!)

79. Daddy Robot (Today was Mr. TBaM's birthday and The Boy was desperate to get him a robot costume, no easy task for an adult!)

80. Tired Eyes (We had to fly solo today as nanny, who had been looking after us all week, came down with the dreaded flu bug. I'm ashamed to say The Boy spent the day being entertained with the television, iPad or laptop. Dreadful parenting!)

81. 'Ear, 'ear (We set to making our Easter Bunny mask yesterday, as we'll be away in the week leading up to Easter.)

82. Speckled Egg (We finished off our Easter decoration eggs today, far from eggs-citing but I'm panicking about packing before our holiday tomorrow!)

TheBoyandMe's 365 Linky
MWTWbadge
akiltandacamera.com

How To Make An Easter Bunny Mask

I've got a whole load of Easter crafts on the go at the moment, it's a really fun time of year for creativity. When 3M Scotch set us a challenge to create some Everyday Magic at Easter with the children by working on an Easter craft challenge using the Scotch Brand products, we decided to make an Easter Bunny mask. The Boy is never that keen to wear a bonnet, but loves the idea of pretending to be the Easter Bunny and he's been practising his bunny hops for weeks now!

How To Make An Easter Bunny Mask

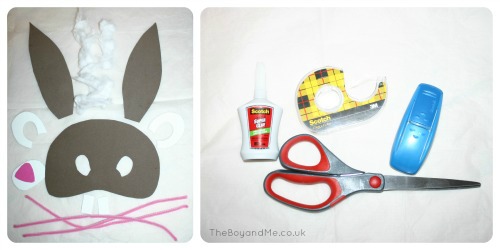
You'll need:

  • cotton wool
  • pink or white pipecleaners
  • brown foam sheets (pink would also work, as would felt or thick card)
  • white foam sheets
  • pink foam sheets
  • ribbon to tie (or elastic)
  • double-sided tape, sticky tape strips, superglue (PVA doesn't stick well on foam)
  • scissors (these are precision scissors from Scotch 3M)

How To Make An Easter Bunny Mask

1. From the brown foam, cut out two long ears and a face shape, just the top half of the face will do. Position this over your child's face and use a pen to make on where their eyes are, remove and cut eye holes.

2. Cut a 'snout', eye shapes out to surround the eye holes, and two buck teeth from the white foam.

3. Cut a nose from the pink foam.

How To Make An Easter Bunny Mask

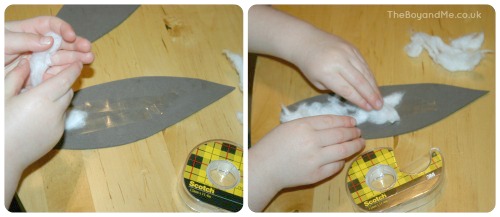
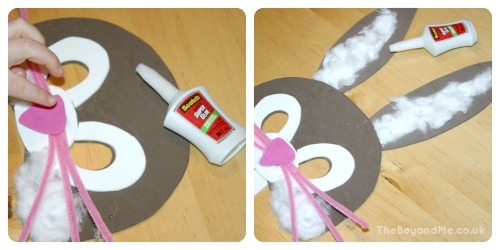
4. Put some strips of double sided tape on the inner part of the ears, and stick fluffy cotton wool on. The double-sided tape works better on foam than PVA glue.

How To Make An Easter Bunny Mask

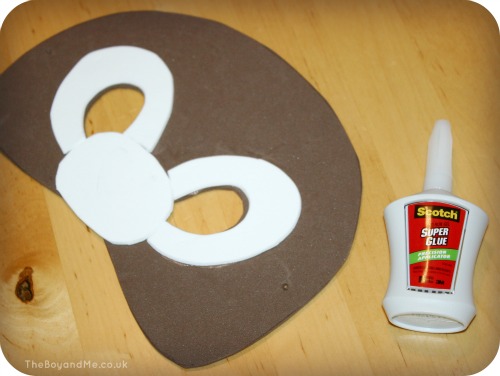
5. Use the superglue to glue the 'snout' and eye surroundings onto the main mask. This should be done by ADULTS, take care with superglue and follow the instructions carefull.

How To Make An Easter Bunny Mask

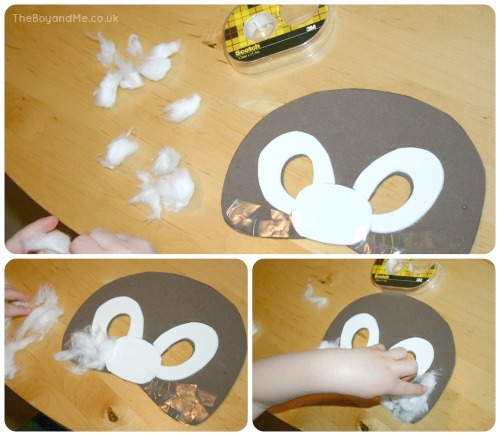
6. Place double-sided sticky tape over the cheeks of the bunny's face, and cover this with more fluffy cotton wool.

How To Make An Easter Bunny Mask

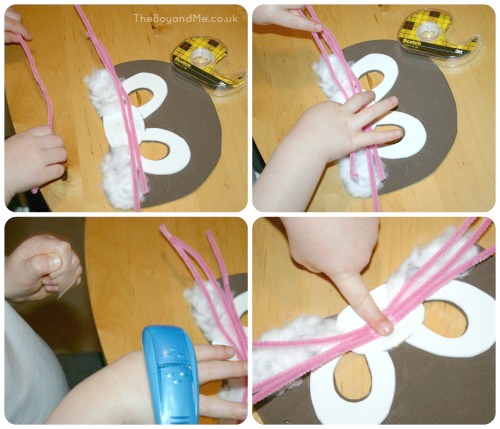
7. Place a strip of double-sided sticky tape on the centre of the white 'snout' and put the middle of the pipecleaners onto these close together, pressing them down firmly. Cover this with a strip of sticky tape.

How To Make An Easter Bunny Mask

8. Put a generous dollop of superlue over the centre of the whiskers and push the pink nose on top of this. Again ADULTS ONLY, The Boy is not touching that superglue, he's just pointing to the nose.

9. Make a small hole either side of the mask, about an inch in, and thread pink ribbon through and tie it. You could also use elastic for this.

How To Make An Easter Bunny Mask

For more information on 3M Scotch products, please visit their Facebook page.

This tutorial is sponsored by 3M Scotch who also sent a selection of 3M Scotch products to help complete my own project.


Sunday Showcase


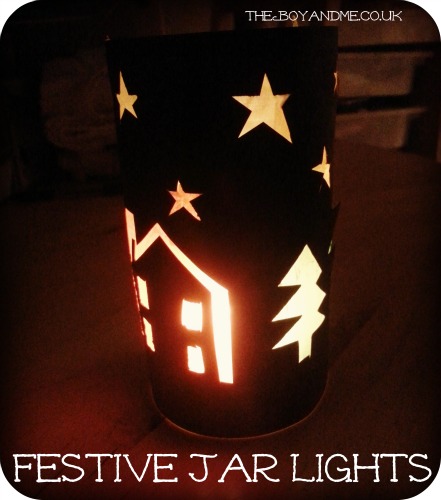
Festive Jar Lights

Candles and lanterns are an obligatory part of Christmas decorations, and after our success at making a stained-glass window picture, we decided to make our own lantern using the same technique.

You'll need:

  • a jar
  • PVA glue
  • coloured tissue paper
  • black paper or card
  • scissors
  • pencil
  • candle

Christmas craft

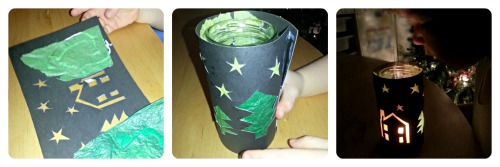
  1. Draw out the outline of your design onto black card (the festive jar lights template is here).
  2. Cut out the parts that will be let the light through.
  3. Glue coloured tissue paper to the reverse side and leave to dry.
  4. Wrap it around a jar and glue it into place, I used a small amount of sellotape to help hold it in place.
  5. Place a tealight candle insight, rest on a heatproof mat and light the candle. (Never leave a child unattended with a lit candle, or leave a candle burning unattended).

christmas crafts

'Counting Down To Christmas' is a craft bloggers link-up held each week in the eight weeks preceeding the big day itself. Each week we will be posting a different Christmas craft activity.

Rainy Day Mum ~ The Boy and Me ~ The Madhouse ~ Here Comes the Girls


Related Posts Plugin for WordPress, Blogger...