Pre-School Science: Absorption & Colour-Mixing

I first saw this idea on the marvellous Pinterest, and it originally came from a children's Australian TV Programme.

As far as The Boy was concerned we were about to perform magic, but then what else is Science if not a complete and utter mystery. It is to me anyway! So I posed him a question, showed him the equipment and waited to see what he'd say.

How can we make the coloured water travel from one glass to another, without touching it?

You'll need:

  • equal quantities of blue and yellow food colouring (although any two primary colours will work)
  • two glasses half-filled with water
  • one empty glass
  • two sheets of kitchen towel (absorbent but those with thirst pockets might not let it drip out again!)
  • two spoons for stirring
  1. Place the three glasses in a row with the empty one in the middle.
  2. Pour yellow food colouring into one end glass, and blue into the other end glass. Give them a stir with separate spoons so as not to mix the colours prematurely.
  3. Fold the kitchen towel strips into quarters, lengthways.
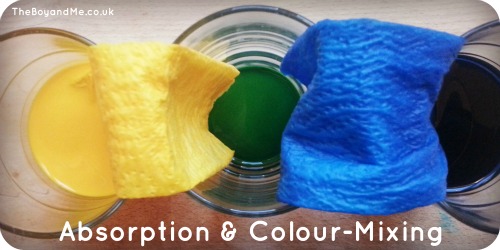
  4. Place one strip into the yellow food colouring and one into the blue. Fold the free end over into the empty glass in the middle and tuck it down to the side so they aren't touching.
  5. Wait and watch the results!

Colour-mixing

The Science Bit:

Kitchen towel is highly absorbent and the coloured water travels up the kitchen towel slowly defying gravity. It happens due to a force called 'capillary action'; a force of attraction between the paper fibres and the water. How does the water actually move up through the paper towel? The water is pulled up into the open spaces between the fibres in the paper, soaking the paper as it absorbs the water. When the weight of the water in the paper is equal to the upward attraction, then the water stops rising. In this case, gravity kicks in and because the kitchen towel is hanging down, the coloured water drips down into the empty glass.

The colour-mixing is basic science: blue and yellow makes green; red and blue would make purple; and yellow and red would make orange.

(In actual fact, The Boy asked what blue and red would make, and is desperate to try it out. I'd have obliged, but I'd bought up all the blue food colouring in our town yesterday with our playdough and preparing this!)
Colour-mixing

The end result is absolutely fascinating, even Mr. TBaM was enthralled.

Tuesday Tots

fun sparks badge

Playing With Ice

On Friday afternoon I was feeling a little low and wishing that I could have gone to the thanksgiving service of a friend, when inspiration hit me. As a former science teacher and co-founder of Science Sparks, Kerry loved making it easier for children to understand science and so I felt what better way to honour that, than get to grips with a science 'experiment' with The Boy.

I'd seen this activity on Pinterest which, while intended for Christmas, gave a great bank of ideas for playing with kitchen and craft materials to see what happens. I prepared the activity while The Boy napped and then we were ready to have fun with some ice!

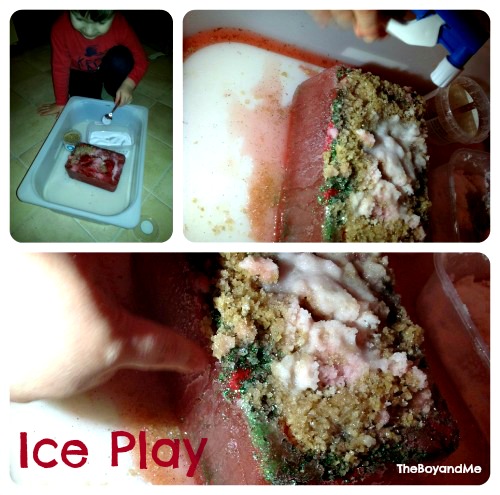
I used a takeaway container and filled it with water, food colouring, glitter, sand, and sequins and then placed it in the freezer. When it was set I removed it and placed it into a tray, giving The Boy a pot of table salt and rock salt, a spoon and a water spray bottle.

playing with ice 1

He had brilliant fun making holes in the ice block with the salt and the jet of water. After a while the salt dissolved into the water and ran down the side of the block causing channels to be melted in. The Boy spotted these and picked off the ice crystals. The look of wonder on his face when he held the ice crystals in his hand, and they then subsequently melted, was amazing; sheer amazement!

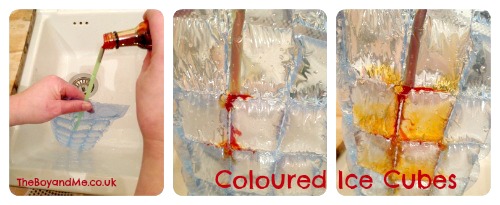
Following on from this we decided to make some coloured ice cubes using food colouring. I used ice cube bags for this as I wanted to try and get the food colouring to slowly merge with the water creating ice cubes of slightly different shades. I filled the ice cube bags with water first, then inserted a straw and poured the food colouring down the straw.

coloured ice cubes

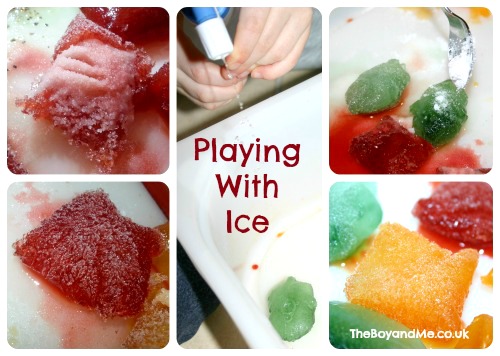
Once these had frozen, I again gave The Boy the tray with the coloured ice cubes, table salt, rock salt and a water spray bottle. The effects were even more immediate because the ice cubes were smaller and therefore melted more quickly.

playing with ice

He was fascinated with the ice crystals that were formed by the salt water solution melting the ice, and kept pouring more and more salt onto one red ice cube to try and create a hole through the middle of it. We discussed what coloured water would appear once the ice melted, and we talked about where the salt had gone. We then discussed the colour of the water once all three different coloured ice cubes had melted and mixed together.

Science Sparks has got a fantastic selection of ice play activities which are great fun for this time of year.

Orchard Toys: Shopping List

If you don't have a copy of one of the most popular Orchard Toys games ever made then you need to get it. And soon.

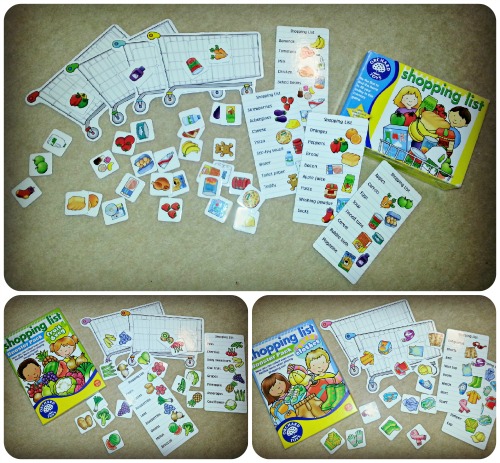
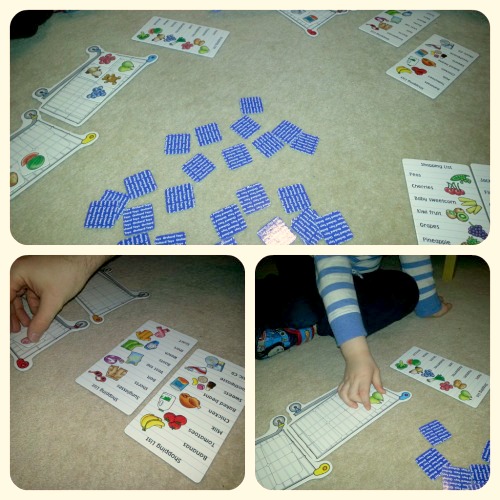
Shopping List is an essential game for children aged 3-7 years because of the way that it takes an everyday situation that children are incredibly familiar with, and provides them with the opportunity to play it at home learning about the different foods available.

Orchard Toys Shopping List

The original game (for there are two booster packs) contains:

  • four cardboard trolleys;
  • four shopping lists with pictures and written names of groceries;
  • 32 grocery cards

The basic idea of the game is that each player takes a trolley, chooses a shopping list and then must fill it with the relevant items on their shopping list, taking it in turns to find them from the muddled, upside-down pile in the middle of all the players. If the grocery item card they pick up is one of theirs they can put it in their trolley, if not the must return it to the middle for someone else to take it. Play continues until one person has filled their trolley.

orchard toys shopping list

Only because we have a three year old who likes everyone to win (you just either win first, second or third) then we play it that rather than return it to the middle, we give it to whoever has it on their list. And yes, it does work which is the beauty of Orchard Toys games, they are adaptable for the needs of the child.

There are two Booster Sets available:

  1. Fruit & Veg
    • Containing two trolleys and shopping lists, there are 16 grocery cards each with an item of fruit or vegetable on it. The fruit and vegetables chosen show a range of everyday foods that the children should be familiar with: pears, potatoes, leeks, melons, cherries, kiwi fruits, asparagus, etc. This is a great opportunity to discuss healthy eating options and where the foods come from or how they grew.
  2. Clothes
    • Like the Fruit & Veg pack, this Booster Pack is designed for two players, this time containing 16 clothes cards showing clothes from different seasons like; shorts, vest top, watch, scarf, flip flops, trainers, jumpers, sunglasses, etc. It provides an opportunity to discuss the clothes that are worn at different seasons (or in this country, the same season but different days!)

Whenever we go away for the weekend this is the one Orchard Toys game that comes with us, having carefully selected the lists we The Boy wants to take; the booster packs are interchangeable with the main game. We've had this game for quite some time now (I'm ashamed to admit how long) and it is the single most played game in the house!

Educational guide:

  • encourage observational and memory skills
  • develop personal and social skills through role-playing and questioning
  • language development (modelling questioning and discussion)
  • healthy eating – PSHE

Shopping List is priced at £7.50 and each of the Booster Packs are priced at £4.50 each.

Christmas Sensory Box (Learning Through Play)

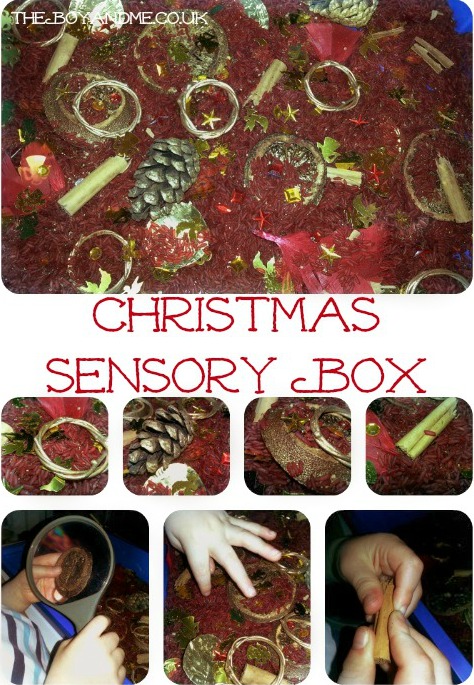
It's been a while since I did a sensory box for The Boy (our Autumn one went mouldy when Nana put the lid on the wet conkers) so I decided to create an exploratory festive box for him.

Sensory tray

I used:

  • white rice coloured with red food colouring and baked in the oven for 90 minutes on 90°C
  • cinnamon sticks
  • pine cones
  • red and gold glitter
  • red sand
  • orange slices painted gold
  • gold sequins and jewels
  • a variety of shiny gold and red items; straw circles, jingle bells, chocolate coin covers
  • ground ginger sprinkled all over.

The best bit of this is giving The Boy a magnifying glass and encouraging him to explore the 'buried treasure'. Sensory boxes are great for fine motor skills development and encourage exploration and communication. The Imagination Tree is the grand master of sensory trays and exploratory boxes.

Advent Activity Calendar

When I finish work every Friday lunchtime I have great intentions about the craft and play activities I can do with The Boy for the forthcoming four days until I return to work, yet by Wednesday I have failed miserably!

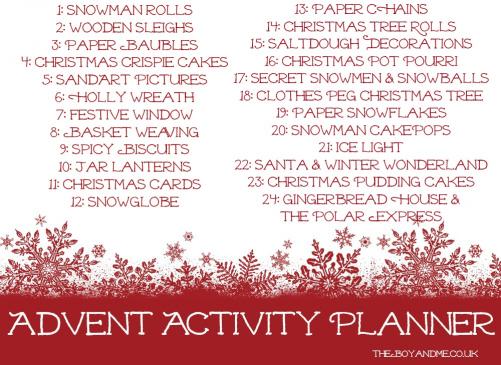
However, tomorrow the festive season starts and I am buggered damned if I am missing out on the opportunity to do great activities with The Boy each day, even more so since I saw this post on Domestic Goddesque the other day. So in pure 'borrowing' style, I have compiled a planner of Advent Activities for us to complete each day which hopefully should see us embrace the seasonal cheer.

What Christmas activities do you have planned?


ToyJeanius: Haba Tack Zap On Duty (Review)

Even though The Boy is getting older and therefore more independent in his choice of toys, I still try and steer him towards the quality end of the spectrum; wooden toys that encourage creative play. Haba is a brand that caters just for that.

As an online wooden toy specialist, ToyJeanius was more than happy to send me something that she thought The Boy would really enjoy playing with; something to get his teeth into.

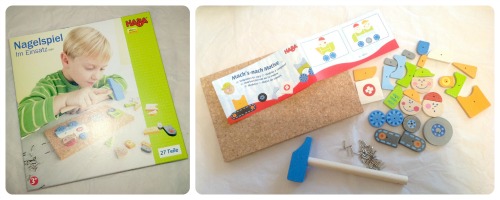
The Haba On Duty tack zap game is a toy which involves laying out brightly coloured, wooden, pre-shaped pieces to create a picture, and then tapping them into place (through the pre-drilled) hole using the tacks and light hammer onto a thick corkboard. The theme of this set is construction/emergency vehicles and provided inside the box are three heads, four wheels, two tracks, eighteen other pieces and enough tacks to nail them in. (There are other Haba tack zap games which could be used alongside it to create different scenes.) There is also a handy pamphlet with nine templates to follow if inspiration is needed.

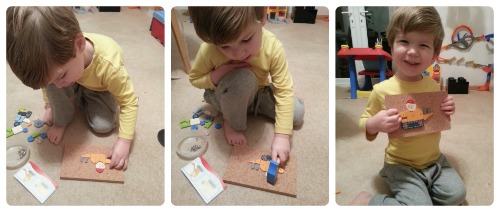
For The Boy, this is an ideal toy as he can either copy the templates or make a picture up himself, and he pretends to be Grandad hammering as he's playing it. The corkboard is of a good quality that the tacks don't fall out, giving them a little press first when tapping them in is something I'd recommend as it gives a grip to start off with. The tacks obviously have a point to them, but they aren't dangers and the wooden hammer is just the right size for little hands. I would say that it's to either do one piece at a time, or lay them all out and push a tack into place, as otherwise the pieces bounce all over the place when hammering them down.

This toy has given The Boy hours of fun, and as it is for 3-7 year olds I can see it lasting for a few years yet!

The Haba On Duty tack zap game is available from ToyJeanius for £14.95. Readers of this blog can receive a 10% discount by entering TheBoyandMe at the checkout.

We were sent this item for the purpose of this review. Our opinions are honest and unbiased.

How To Make A Play Kitchen

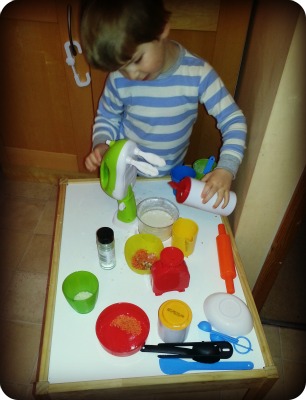
I've always wanted a wooden play kitchen for The Boy, but they're incredibly pricey and we just don't have the space for one. It's such a shame because I know he'd love one and would spend hours pretending to cook on it, just as we do in real life. But I can't magic more space or money so unfortunately, I had resigned myself to no cooker for him.

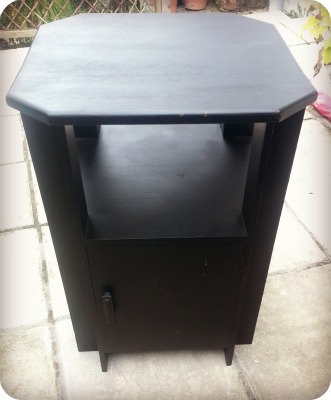
And then I saw a tweet from @Scrapbookerry showing a Pinterest idea she'd seen to use a side table and turn it into a play kitchen. The idea originally came from a site called Ikea Hackers. So I repinned the idea on Pinterest, and in my brain, and we set off for the car boot sale to sell our unwanted treasures. After we'd packed up, we wondered around and with my beady eyes, I managed to spot this little gem, which I bargained the guy down to £3 for!

How to make a play kitchen

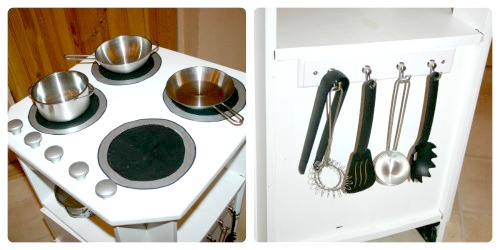
As there was no time like the present, we nipped over to the nearest DIY store and bought some white paint, a row of hooks and some knobs.

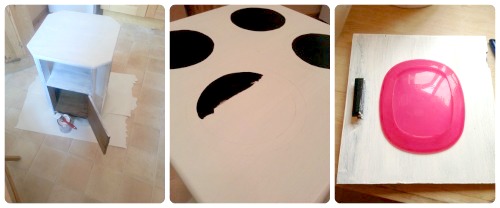
The next step was to sand it all over to remove the top layer of the black paint and smooth any sharp edges. Then to start on the many coats of white paint (four in total) I needed to cover the black.

how to make a play kitchen

Next I measured out and drew four circles on the top of the cupboard to make four cooker rings. These were painted black with a silver ring around the outside of them.

The door was removed, a plastic plate used to draw around and my husband cut out that shape from the door. I sanded the edges, painted both sides of the door, and then used masking tape to edge a piece of perspex we had lying around, and superglued it onto the inside of the door.

Finally my husband drilled five holes along the front to attach the knobs that I had painted silver, and screwed the hook unit onto the side of the cupboard.

Cost:

  • table – £3
  • paint – £8
  • knobs – £4
  • hooks – £4
    • Total = £19

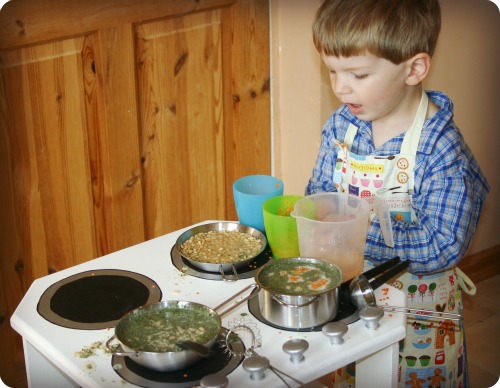
    DIY play kitchen

I bought the saucepans & utensils for £14.

Me and My Shadow

Learning Through Play: Sand Drawing

The Boy is becoming more and more curious about letters. He's desperate to know what they are called, he's practising the names and sounds that he's familiar with all the time, he's trying to form the shape of them in the air and finding letters he knows in books. I'm going to start focusing on the key letters and playing bingo games involving them because he just wants to learn!

One of the best ways to learn numbers and letters is through play. And one of the best ways to practise the formation of them is through play as well. The key point to note is that if littlies can't do it on a large scale, they can't do it on a small scale. So if they can't form the shape of letters in the air or a variety of other ways, then they won't be able to do it with a crayon on paper.

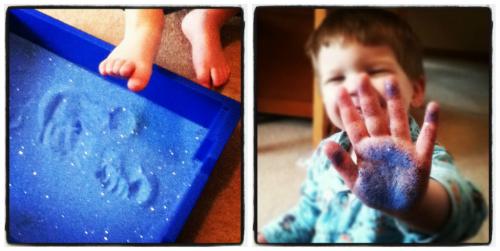
So we've been practising our pre-writing skills in a tray of coloured sand, to which I added glitter to make it more sparkly and attractive.

pre-writing

We explored the texture of the sand, making hand and foot prints.

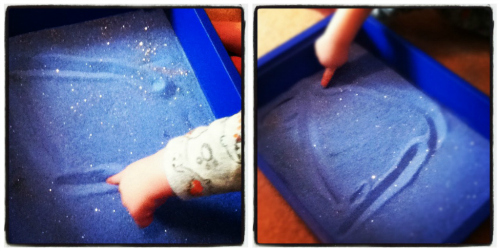
We've been practising our shapes, squares are easy but triangles are tricky!

pre-writing

We drew faces and numbers.

learning through play

Before we moved onto drawing letters. Initially, I drew the letters in the sand while he watched me. Then he held my hand while I drew them so he could feel the flow of the shape, then I drew them and he drew over the top of my letter. next he progressed onto drawing them himself. The hardest part in all of this was that, because The Boy is left-handed, I had to reverse it and draw it with my left hand myself!

Forming letters in sand in a big tray is one of the activities that is frequently used in my school in both nursery and reception. As I've said before, until they can do it on a large scale, the smaller and more accurate writing doesn't happen. And we should be encouraging them to draw zigzag, wavy, curved and straight lines, as these are the shapes of our alphabet.

Other good materials to do this with are wood shavings or sawdust, shaving foam and that weirdy bath jelly gloop stuff. Anything that holds the shape once a finger has been drawn through it.

I bought my coloured sand from e-Bay.

Sciencesparks3

Related Posts Plugin for WordPress, Blogger...