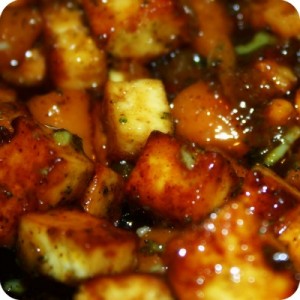
Recipe Shed: Butternut Squash and Spinach Lasagne

I'm adapting and editing this recipe from the original one published in February 2012, due to the fact that I've discovered the filling cooks much more nicely in the slow-cooker.

Vegetable lasagne.

One of the staples of most pub menus and a reliable dish to produce on mass and in a hurry for vegetarians anywhere. But good God, it's boring. I get so fed up of mushrooms, broccoli and carrots stagnating in a heavy tomato sauce and then drenched in a non-descript bechemal sauce. When I make vegetarian lasagne, I tend to make it with quorn mince, and whoever I serve it for, absolutely loves it. This always surprises me because;

  1. I'm a decent cook but certainly not Delia
  2. it's vegetarian and people normally complain if I enforce a non-meat dish on them.

However, the serving dish is scraped clean as people always go back for more. And despite the fact that my mother-in-law once highlighted that it wasn't a proper vegetarian lasagne because it didn't use vegetables, she wolfs it down too.

Saying all this, last week I had half a humble butternut squash that needed using up and having had risotto the night before (and not in the mood to make pastry for tomato and butternut squash pies), I decided to make a lasagne using the bizarre orange vegetable.

  • Chop up the butternut squash, boil for 10 minutes until starting to go tender, strain and add a tin of chopped tomatoes, herbs, salt and pepper. Stir through.
  • Amendment (22/04/12): Chop up the butternut squash and add to the slow cooker, with a tin of chopped plum tomatoes, two tablespoons of mango chutney and a generous teaspoon of wholegrain mustard. Leave it to simmer away on low for four hours. The butternut squash will be tender but retain it's shape and the mango and mustard will have infused into the sauce creating a mix of sweet and sharp.
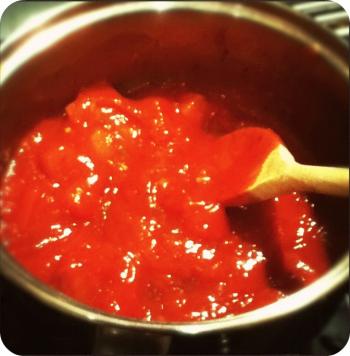
  • The ingredients for the bechamel sauce are the same as for any, however when melting the butter, add spinach to it to wilt. To this, add a spoonful of cornflour, stir together and then add the milk, mixing everything with a balloon whisk. Once it starts to thicken up, add a handful of cheese; goats cheese is the obvious one for me with spinach, but cheddar works well if you haven't got any.
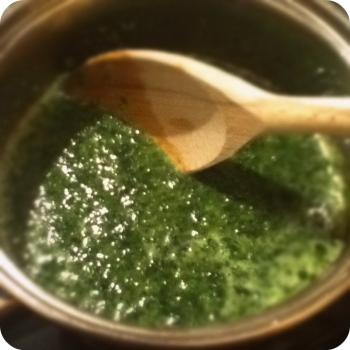
  • Place a lasagne sheet (I use fresh egg pasta as it cooks quicker) on the base of the dish, then spoon over half of the tomato and butternut squash mix. Add a pasta sheet on top, a layer of spinach sauce to cover this, another pasta layer, the remainder of the butternut squash mix, another pasta sheet, more spinach sauce to cover, another pasta layer and cover the top with spinach sauce. Sprinkle cheese over the top and place in the oven for 20 minutes.
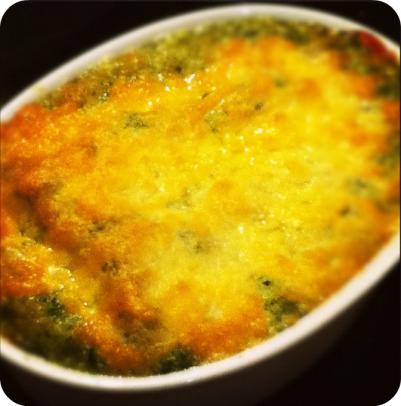
I remember watching This Morning while on maternity leave, and Gino d'Acampo said you should let lasagne rest for ten minutes or so once out of the oven. I agree, it solidifies a little more and is easier to serve, retaining its heat well.

Serve with lollo rosso or another curly lettuce.

I'm linking this up to Reluctant Housedad's Recipe Shed, click below for more vegetarian recipes.

Recipe Shed

I'm also linking it up to Slow Cooker Sunday on Mediocre Mum

Best recipes of 2012

Recipe Shed: Butternut Squash (& Blue Cheese) Risotto

When I saw that this week's Recipe Shed theme was 'vegetarian', I knew it would be rude of me not to take part. This recipe is one of our favourite meals, we don't normally have it with blue cheese but I have some in the fridge which is in danger of being more blue than cheese, so I'm bunging that in too!

Depending upon which degree of vegetarianism you subscribe to, this may need altering to suit your requirements. For example, I have a Bachelors in Vegetarianism: I don't eat meat or fish, but don't sift through the cheeses to find rennet-free types in the supermarket. Life's too short to stuff a mushroom, ya'know. If you have a Masters in Vegetarianism, then you may want to substitute the single cream for something like Alpro Soya, likewise the cheese. If you have an HND in being a Veggie, then you need to realise that eating fish makes the rest of us have to say "no, I don't eat fish because I'm a vegetarian!" so thanks for that!

Ingredients

  • handful of mushrooms
  • one leek
  • 2 handfuls of arborio rice per person
  • half a butternut squash
  • a stock cube
  • 2 (ish) pints of hot water
  • 100ml of Single cream
  • blue cheese
  • Parmesan
  • unsalted butter

1. Cut the butternut squash up into small chunks and cook for ten minutes in 2 pints of hot water and a stock cube.

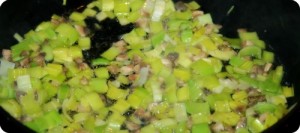
2. While that's bubbling away, thinly slice the mushrooms and leeks. As The Boy is sharing this with us, I cut the leeks up very small. As neither of us like the texture of mushrooms then these also go very small. Sweat them down in a generous knob of butter.

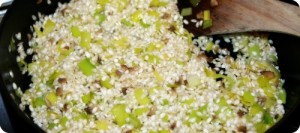
3. After five minutes, add the rice to the pan of butter, mushrooms and leeks. I can't remember why, I think it's something to do with coating and sealing each grain of rice with the butter, but I could be making that up! Leave it for a minute or two, stirring halfway through.

4. Transfer two ladles of stock (not the butternut squash though) into the pan with the rice and stir through. This initial water will disappear quickly so give it a stir and add some more.

5. This is the bit which requires constant attention and judgement. The risotto will need stirring every minute or two to stop it sticking, and the second the water has been absorbed into the rice, you need to add another ladle of stock. This is why I am typing this up on the iPod Touch while I'm busy watching the rice (in fact, I was so busy explaining then I forgot to stir and my rice stuck in one section!). This will take about twenty minutes on a low heat. You might need all the stock, you might not. Transfer the butternut squash across at the end.

6. When the risotto has plumped up and absorbed most of the liquid (apart from a small amount around the sides), taste it to check. It should have a small bite to it and not be slushy. However, chewy risotto isn't right so possibly add a bit more water and cook it for a few minutes longer.

7. Add the single cream and the cheese and stir through. Keep on the heat for a further minute to make sure the heat has melted the cheese.

8. Serve with a sprinkling of Parmesan on top.

Pop over to Reluctant Housedad's Recipe Shed to check out the other veggie delights by pressing this linky doo-dah malarky!


Recipe Shed

Recipe Shed: Chutneys and Preserves

There's a lingering aroma in this house, and it's permeating through the cables tethering us to the outer world, finding it's way through the timeline of many a twit and combining with other bloggers' fragrances.

No, it's not the latest parfum. It's a far more consuming smell than that.

Vinegar.

Of course, there are the variants: red wine, white wine, balsamic, malt and pickling, but they all have the one purpose. To preserve our chosen fruit or vegetable, creating a mouth-watering chutney that needs to be given time to mature and reach its full-bodied flavour.

I've been like a woman possessed recently. Never having made a chutney before, I've been having a go at a few different types, experimenting with and altering recipes that I've found. Noting changes down in my recipe folder, splashing it with spices and caramelised onions for that added authenticity.

But I'm not the only one. My timeline (and inbox) is full of others who've been taken with the preserving passion, and so I said to Reluctant Housedad last week that he ought to do it as a theme one week for his successful Recipe Shed linky. After the tumbleweed had finally settled, he kindly told me that it wasn't 'his bag' (because we are in the '70s) and offered for me to host the Recipe Shed this week while he visits family for half-term. I jumped at the chance!

So here you have it, for one week only:

TheBoyandMe hosts the Recipe Shed!

Caramelised Red Onion Chutney

Ingredients

  • 8 red onions
  • 1 red chilli
  • 25ml olive oil
  • 200g brown sugar
  • 150ml balsamic vinegar
  • 150ml red wine vinegar

1. Cut the onion and chilli into short thin slivers and put into a heavy pan with the oil. Cook gently over a low heat for 30 minutes, stirring occasionally.

2. Once the onions are dark and sticky, add the sugar and vinegars. Cook on a high heat until bubbling (usually about 30 minutes), then turn the gas down to simmering for a further hour. It will be ready when drawing a wooden spoon through the mixtures leaves a channel behind that doesn't immediately fill with liquid or juices.

3. Immediately, spoon the chutney into sterilised jars, filling almost to the top of the jar.

4. While still piping hot, press a wax disc down on the mixture (wax side down) ensuring that it has been pushed against it fully with no air bubbles. Wet a cellophane circle (especially for preserving) on one side and place over the hot jar, damp side up. Pull it tight and use a tight elastic band around the neck. As the mixture cools, the damp cellophane will be pulled even more taut making it airtight and preventing the nasty bacteria from multiplying. Store for 2-3 months to allow the chutney to mature.

Or if you have some spare that doesn't fit into the bottles, spread it on cream crackers with some mature cheddar and enjoy as a late-night snack.

I've been making quite a few batches of different flavoured chutneys recently, with the intention of giving them for Christmas presents. I've bought some little wooden tags from ebay and am using them to label.

I'd be happy with that, wouldn't you?

Both Reluctant Housedad and I would love it if you would link up to our Chutneys and Preserves linky using the linky tools below. With his permission, I've adapted the code for the badge for this week only so that when it's added to your post, it comes back to this main page.

Next week, he's reclaiming his Recipe Shed where the theme will be Vegetarian in honour of me (I like to think!).

Recipe Shed

Mango & Coconut Paneer

Recently there seems to be cookery going on all around me. Not in real-life™ you understand, that would involve more effort than reheating something from the freezer.

Now I've resisted taking part too much because I am neither a Nigella or a Fanny (steady on), but I'm getting swept along with the tide. With the onset of Autumn and the swiftly arriving Winter, I feel the need for home-cooked goodness.

 Without much further ado, I present to you (fitting into the theme of spices for the Recipe Shed):

Mango & Coconut Paneer

Ingredients:

  • 2 tbspmango chutney
  • paneer – cut into cubes
  • baby carrots
  • broccoli
  • sweet potato
  • 4 tbsp olive oil
  • 1 tsp each of paprika, chilli powder and coriander
  • coconut milk
  • basmati rice

 1. Prep baby carrots, small florets of broccoli and cubes of sweet potato. Par-boil for 10 minutes.

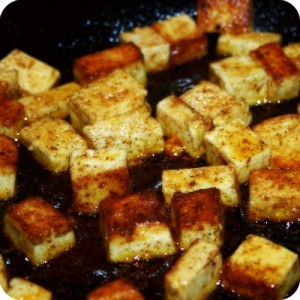
 2. Mix together 4 tablespoons of olive oil, a teaspoon each of paprika, chilli powder and coriander. Cube the paneer and marinade for ten-twenty minutes.

 3. Pour the paneer mixture into a hot frying pan and cook on a medium heat until the paneer is brown and crispy on all sides.

 4. Add the par-boiled vegetables and lightly fry. Spoon in 2 tablespoons of mango chutney and simmer on a low heat. Pour in half a can of coconut milk and reduce down.

 5. Meanwhile, open a packet of Tilda Basmati rice (because I am incapable of cooking rice without it turning to sticky stodge!) and cook in the microwave for 2 minutes. The rice will be light, fluffy and actually be separate grains of rice (as opposed to when I cook rice and it ends up in one mass). Why would go to all that effort when this is perfect?

 6. Spoon the rice into a mould, press down and carefully remove. Serve the paneer immediately.

YUM!

Recipe Shed

I was provided with the Tilda Basmati Rice for the purpose of review, my opinion is honest. I decided to kill two birds with one stone, and Keith didn't mind.

Related Posts Plugin for WordPress, Blogger...